Published

DIY sea salt spray for hair

Growing up, my hair always looked best after swimming in the Pacific or using the original John Frieda Beach Blonde sea spray. I’ve tried a ton of other sea salt sprays since then, none of them are as good. The smell is too strong or weird 99% of the time, they often don’t give quite the right effect, or are stupid expensive.

I tried the DIY version below and haven’t looked back.

***

In a 3oz spray bottle, combine 60g warm water and 8g Maldon salt. Shake until the salt is fully dissolved. Then add 5g squalane oil and 15g aloe vera gel, and shake again. Shake to combine before each use.

If you want to make a bigger bottle, combine 68% warm water, 9% sea salt, 6% oil, and 17% aloe vera. Different hair types may require more or less oil.

See notes below for alternative ingredients, but note that you may need to adjust the ratios if you use substitutions. For example hair gel will behave differently than aloe vera.

***

If you don’t have Maldon salt, you could use kosher or epsom salts. In fact, there’s a lot of epsom salt in the John Frieda version. I use Maldon since it is actually sea salt, and I already have it on hand for cooking.

If you don’t have squalane oil, you’ll have to find another lightweight oil with little-to-no smell. Don’t use coconut oil, it will clog the spray mechanism. Speaking from experience, don’t use olive oil unless you want to smell like a cheap garden salad. I use squalane since I already use it on my face.

If you don’t have aloe vera… maybe you could try some sort of lightweight hair gel? I’d use less though, and be wary of clogging the spray mechanism.

Also, note that not all aloe vera gels are the same. You want something with a high aloe vera content, and you have to check the ingredients list for that. Avoid products with alcohol, and anything that professes to be more than 99% aloe vera. It’s impossible for something to be 100% aloe vera unless you made it yourself from aloe leaves, any product you buy in a tube has to have other chemicals to make it shelf-stable.

For the smellies, sometimes I replace a bit of the water with orange flower water. Could also use a few drops of essential oil, though I haven’t done this yet. I’d love to get close to the original John Frieda eventually… Something like piña coladas and sunscreen.

Edit 7 April 2022: Changed recipe from original (60g warm water, 10g Malon salt, 15g squalane oil, 5g aloe vera gel), it previously didn’t have enough hold and was too oily+salty. Also added substitution suggestions.
Published

A few more grays

An abrupt, hilariously stereotypical physical change over the past six months or so: the major uptick in gray hairs since B was born. I’ve been plucking them. Honestly, I’m not that bothered by them, at least not yet. I’m not removing them because I’m worried about going gray, it will be a while before that happens in all likelihood. (The lady doth protest too much?)

It’s just… satisfying, I think. My hair is dark, identifying and removing this silvery thread to restore the even brown gives a tiny bit of pleasure. But now I’ve got these random, short gray hairs poking out here and there. Probably time to stop.

Published

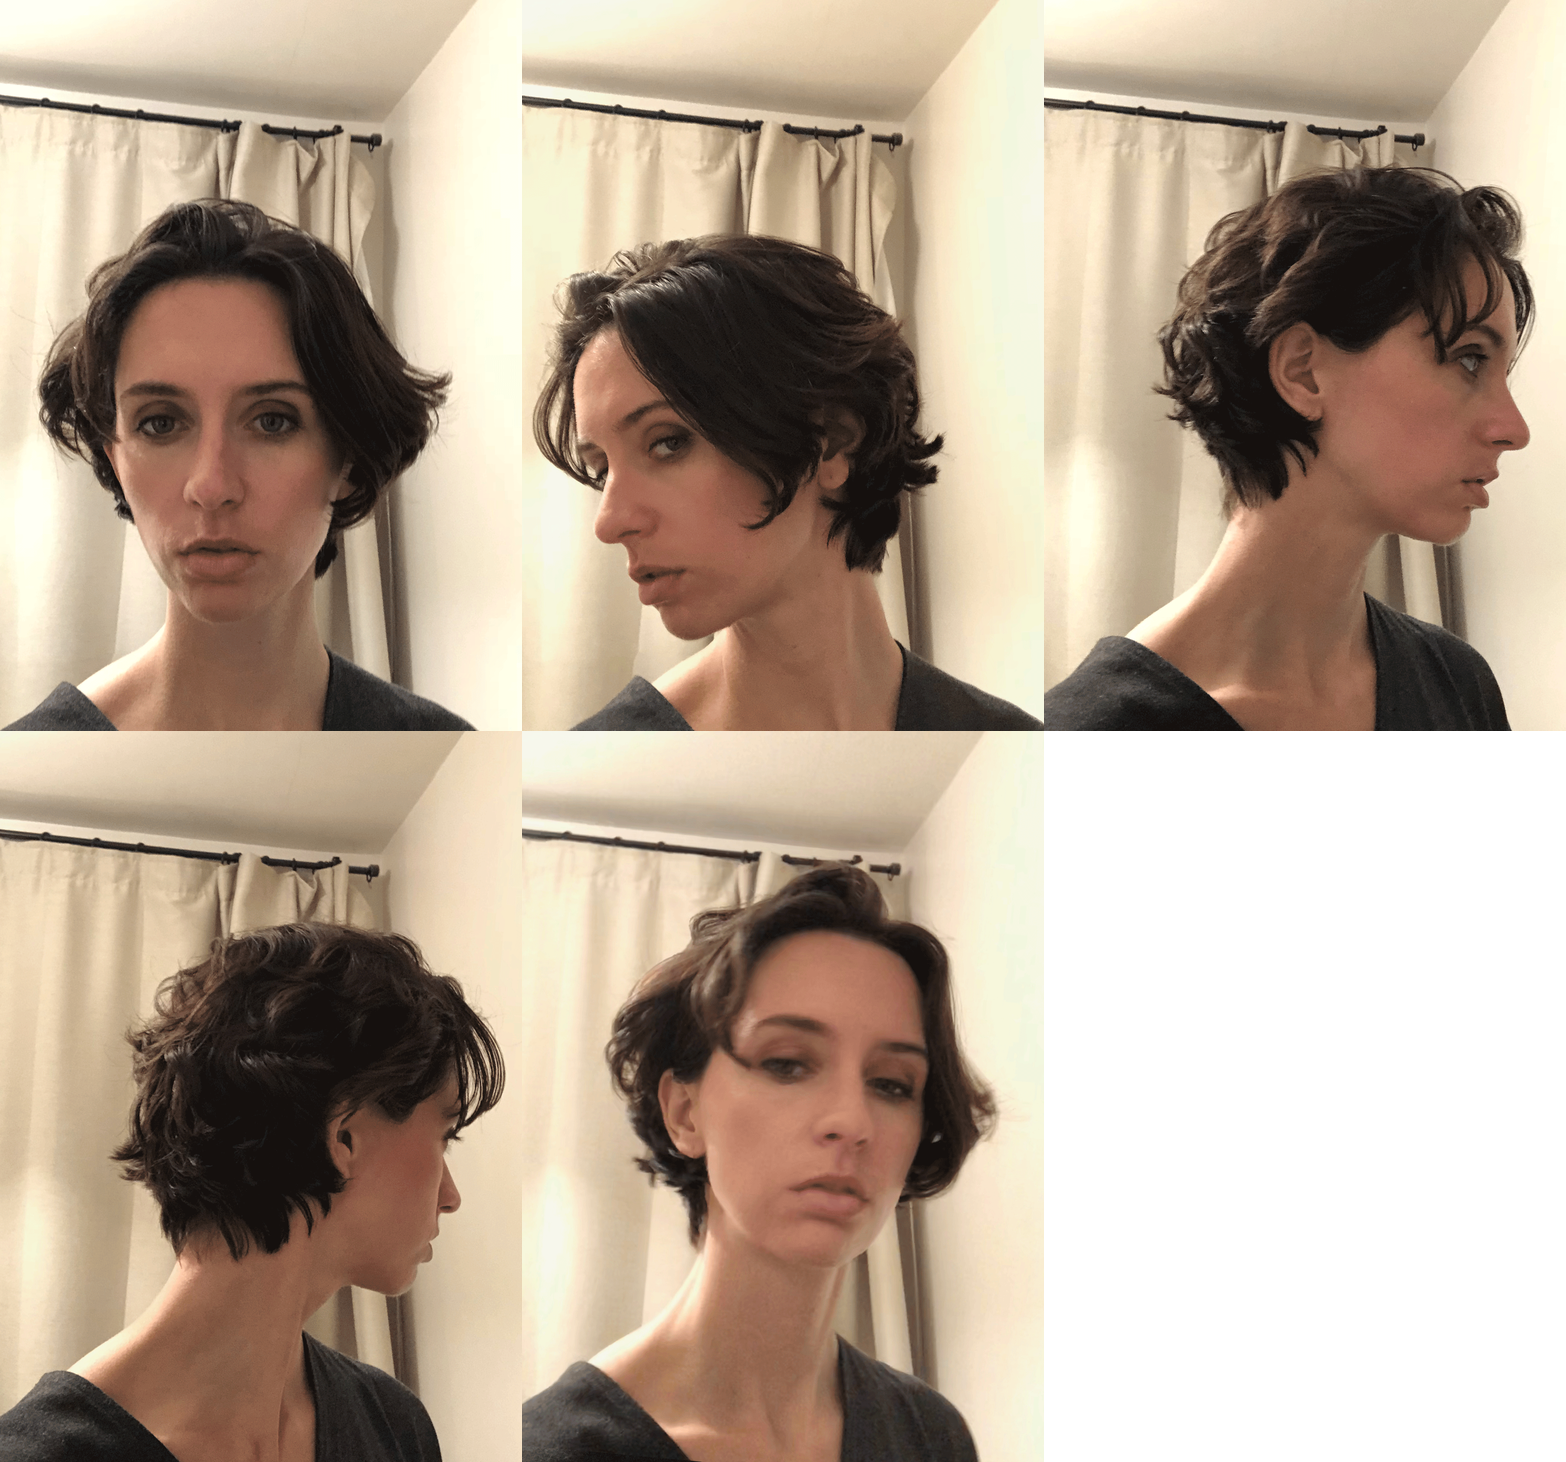
Added layers to my hair

I’ve been growing my hair out for a little while. I loved having it short, but the £££ required to keep it up is not something I’m willing to commit to just yet. I’d like to give long hair a try but get put off when it gets around shoulder length. Not keen on feeling it around my neck and I hate finding long hairs on my sweater, pillow, etc.

It’s at the I-can’t-stand-it point now, looking pretty Basset Hound-y, so time to cut it.

I followed this YouTube tutorial with a few modifications to account for my wavy hair and lack of any straightening options. I skipped the trimming steps since I’m ok with the length right now, it just needs a better shape so that it’s less heavy at the bottom.

These are the basic steps to add layers.

  1. Gather your tools. Make sure you have enough clips + hair ties and a pair of actual hair scissors. I think ours are this pair from Sanguine, about £14.
  2. Assess how much you’re going to take off. Stand in front of the mirror and assess how long you want the shortest layer to be. Do not pull your hair straight to do this. If you have hair that is anything but stick-straight, you need to make sure you account for the loss of length when it is dry. Once you’ve decided, take a small section of hair from the very top of your head in line with your ear, hold it at the length you’d like, and then measure how much you’re planning to take off. Make a mental note or something to remind yourself of how much you’re planning to take off so that you can refer to it when you start cutting.
  3. Assess the angle you’ll use. In one hand, continue to hold the small section of hair that you grabbed in the previous step at the length that you want your shortest layer to be. In the other hand, grab another small section of hair from the same side of your head just behind your ear. The two sections should be directly on top of each other, neither of them should be further towards the back or the front of the head. Pull each section directly away from your head and towards each other. You want to bring the very end of the bottom section up to meet the point at which you’re planning to cut the uppermost layer. On my hair this was a roughly 45 degree angle. If / when my hair gets longer, I might be pulling it more directly upwards like the stylist does in the video. Remember the angle you establish since you’ll use that in a moment.
  4. Section your hair. Separate your hair in to sections by making a centre part from your forehead back to the nape of your neck and then additional top-to-bottom parts on either side of your head. Make sure each of the sections is tightly secured. I separated it in to four parts as he recommends in the tutorial, next time I’ll do six though since it would suit my hair thickness a little better.
  5. Trim the first section. Let down one of the front sections, and then brush it up and out in the angle you established previously. Holding it up at that angle, slide your finger or a comb through from front to back just around the height of your ear, and then let the lower piece down. This is forming a decent base so that you retain the length. If you don’t do this, you might end up getting some shorter layers falling out when you try to put your hair up! Run your brush through again at the required angle to get it smooth, and then put in a hair tie. Slide the hair tie down the hair keeping it at the required angle until it is a few centimetres above the length you’re planning to cut. Bring this loose ponytail slightly forward so that it is easier to see without pulling any of the hairs in the hair tie. Use your fingers in your non-dominant hand to splay the ends out a bit, and then point-cut in to the ends until you have taken off roughly the amount of length you planned to take off. Remember, you can always take off more later. Err on the side of caution.
  6. Trim the remaining sections in the same way you trimmed the first section.

I’m pretty happy with the results. This technique will do for now, but I’ll absolutely head back to a stylist once all of this is over with and we’re settled somewhere. Will miss Dean. 🙁

Related: See this video for what seems to be a decent scissor-over-comb men’s haircut tutorial…

Published

Britney Spears on her shaved head

bloodblistersisters:

britneyjustin:

britsanity:

Witnesses say they asked Britney why she shaved her head and her response was, “I’m tired of plugging things into it. I’m tired of people touching me.”

T-Pain: “That was the most beautiful thing in the world. Do you know why she was shaving her head? Because it was so important to other people. She is like, “Listen. Don’t touch my hair anymore. Stop touching my hair.” People were like, “We’ve got to make your hair before you go outside. You can’t leave.” She went … “Now I don’t have hair. What you going to do?”

Our Diva Britney Jean Spears

BODILY AUTONOMY


Edit 2 July 2021:

I was revisiting this recently in light of Britney Spears’ infuriating and terrifically sad conservatorship hearing.

The post above was originally a Tumblr reblog, from back when this site was on Tumblr. I was curious about the origins of these quotes so did a little digging.

The witness response quote source is unclear. According to some sources, something along these lines was said by Emily Wynne-Hughes who was present (As a tattoo artist? As a customer? Uncertain) when Britney got tattooed after shaving her head. All of these sources point to one another though and some are… questionable. Hence why I’m not linking to them. Go ahead and search “Emily Wynne-Hughes Britney Spears” if you’re curious.

The origins of the T-Pain quote are clearer, it’s from a 2007 Associated Press interview. He supposedly recorded three songs with her right after she shaved her head (source).

When I was looking for the quote sources, I came across the 2008 TV documentary “Britney Spears: For The Record”. This is the exchange around 16min 25sec in during an interview at The Mondrian Hotel in LA:

Interviewer When you look back at the whole shaving of the head thing, and all the rest of it. What provoked you to do that?

Britney Spears I was going through so much artificial stuff with my kids and with Kevin and all that stuff at the time, and he’d just left me. And I was devastated, you know? People thought it was me going crazy and stuff like that, but people shave their heads all the time. I was going through a lot, but it was just kind of me just feeling a form of a little bit of rebellion or feeling free, or shedding stuff that had happened.

Interviewer Why did you not tell anyone that’s what you were doing?

Britney Spears I didn’t think it was anyone’s business, really.

She’s right.