Published
How to make a Rietveld-esque crate stool / table
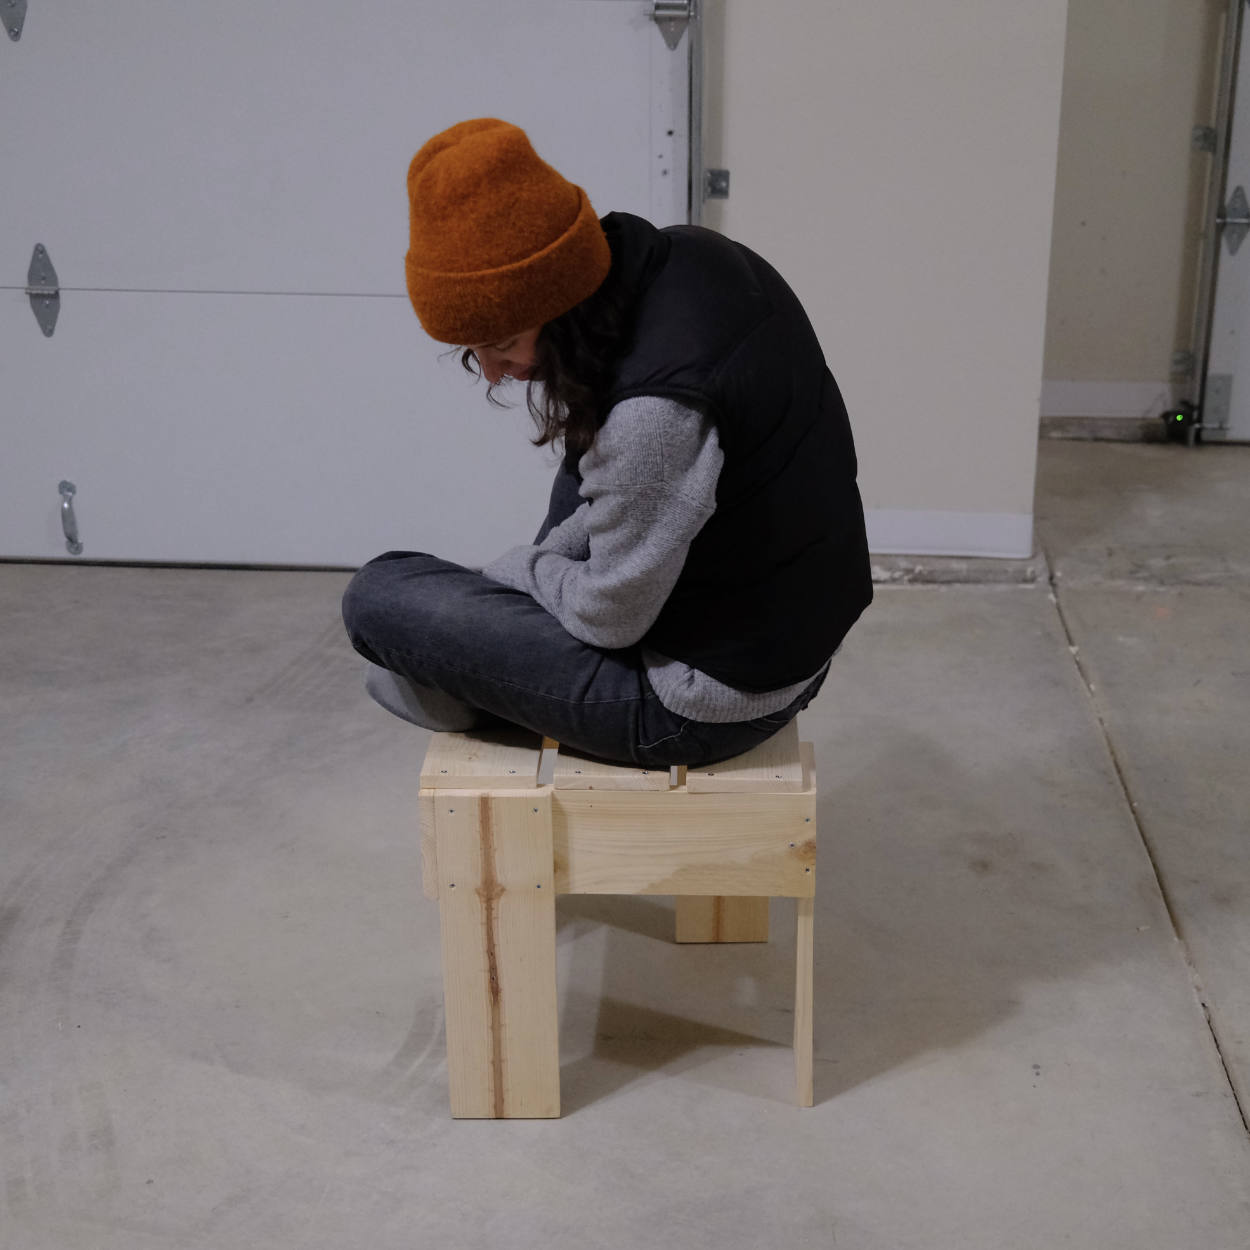
In late February, we made a stool based on Gerrit Rietveld’s kratkrukje or “crate stool” designed in the mid 1930s. Skip to the instructions, or skip to the cut list and plans.
We’d been looking for something that could act as stool-cum-sidetable for a little while. Haven’t had any luck with secondhand or antique shops, everything we found was too ornate, large, cushion-y, or expensive. And while we’re fine with the idea of buying something from Ikea or a similar store, nothing we found felt quite right. Also, the thought of wandering through Ikea at the moment made us a bit anxious.
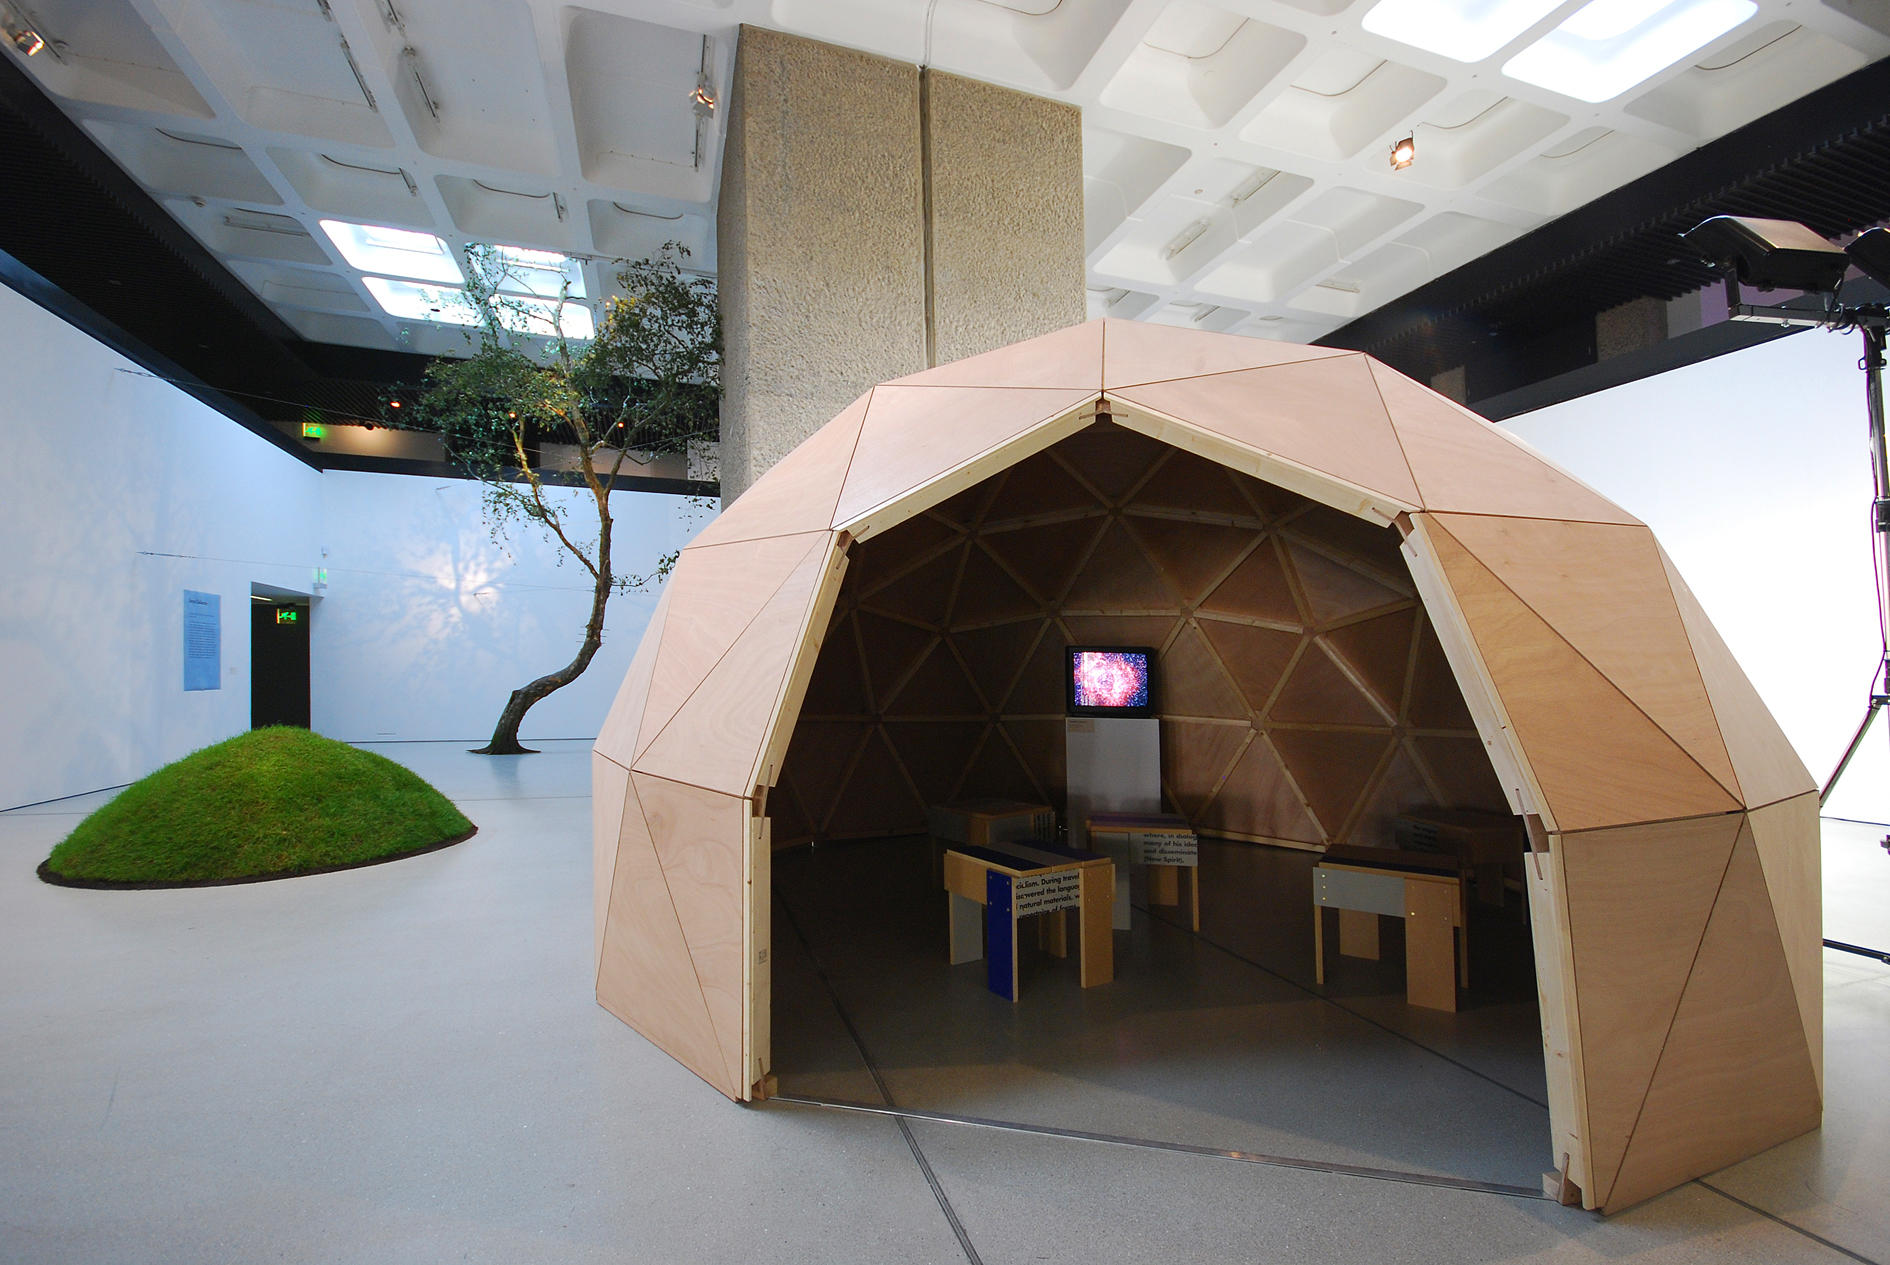
So having had success with Enzo Mari’s Autoprogettazione in the past and buoyed by Hannah’s Rietveld crate chair success last summer, we decided to go down the DIY route. Rietveld’s crate stools have been on Sam’s mind since he saw them in the Radical Nature exhibition designed by Sara De Bondt at the Barbican back in 2009. Those stools were created by Simon Jones of Jones Neville by reusing and cutting down old exhibition panels.
There are a bunch of Rietveld crate furniture photos and designs knocking around the world wide web, but very little relating to this specific stool as far as I can tell. I have a feeling that it wasn’t included in the bilingual book How To Construct Rietveld Furniture, but can’t be sure since I don’t own it.
At any rate, there are a few photos online including this photo from Bibliotheek Rotterdam, this blog post, and a photo of the stools in situ at the Radical Nature exhibition.
According to Bibliotheek Rotterdam:
This stool is known to exist in several sizes. Metz & Co. also sold a table similar to this design. According to Gerrit Rietveld’s son, Jan Rietveld, both the Rietveld and Schröder families were involved at one time or another in producing and selling Crate Furniture.
Since we couldn’t find plans for the stool, we made our own based on the photos mentioned above. We didn’t have scraps to reuse as Jones so elegantly did, so we ended up buying three 1″ × 6″ × 6′ whitewood boards and basing our plans on the most economical use of that lumber.
It’s definitely a bit more expensive than a KYRRE stool from Ikea, the materials were a little over $30 in total and of course there’s the labor. We did this in a few hours over the course of a few days, but it probably took us longer than it would normally because we were working out the process and tweaking our initial plans as we went. All-in-all it was worth it. It’s a satisfying little lump of furniture.
Here are the steps to make one for yourself.
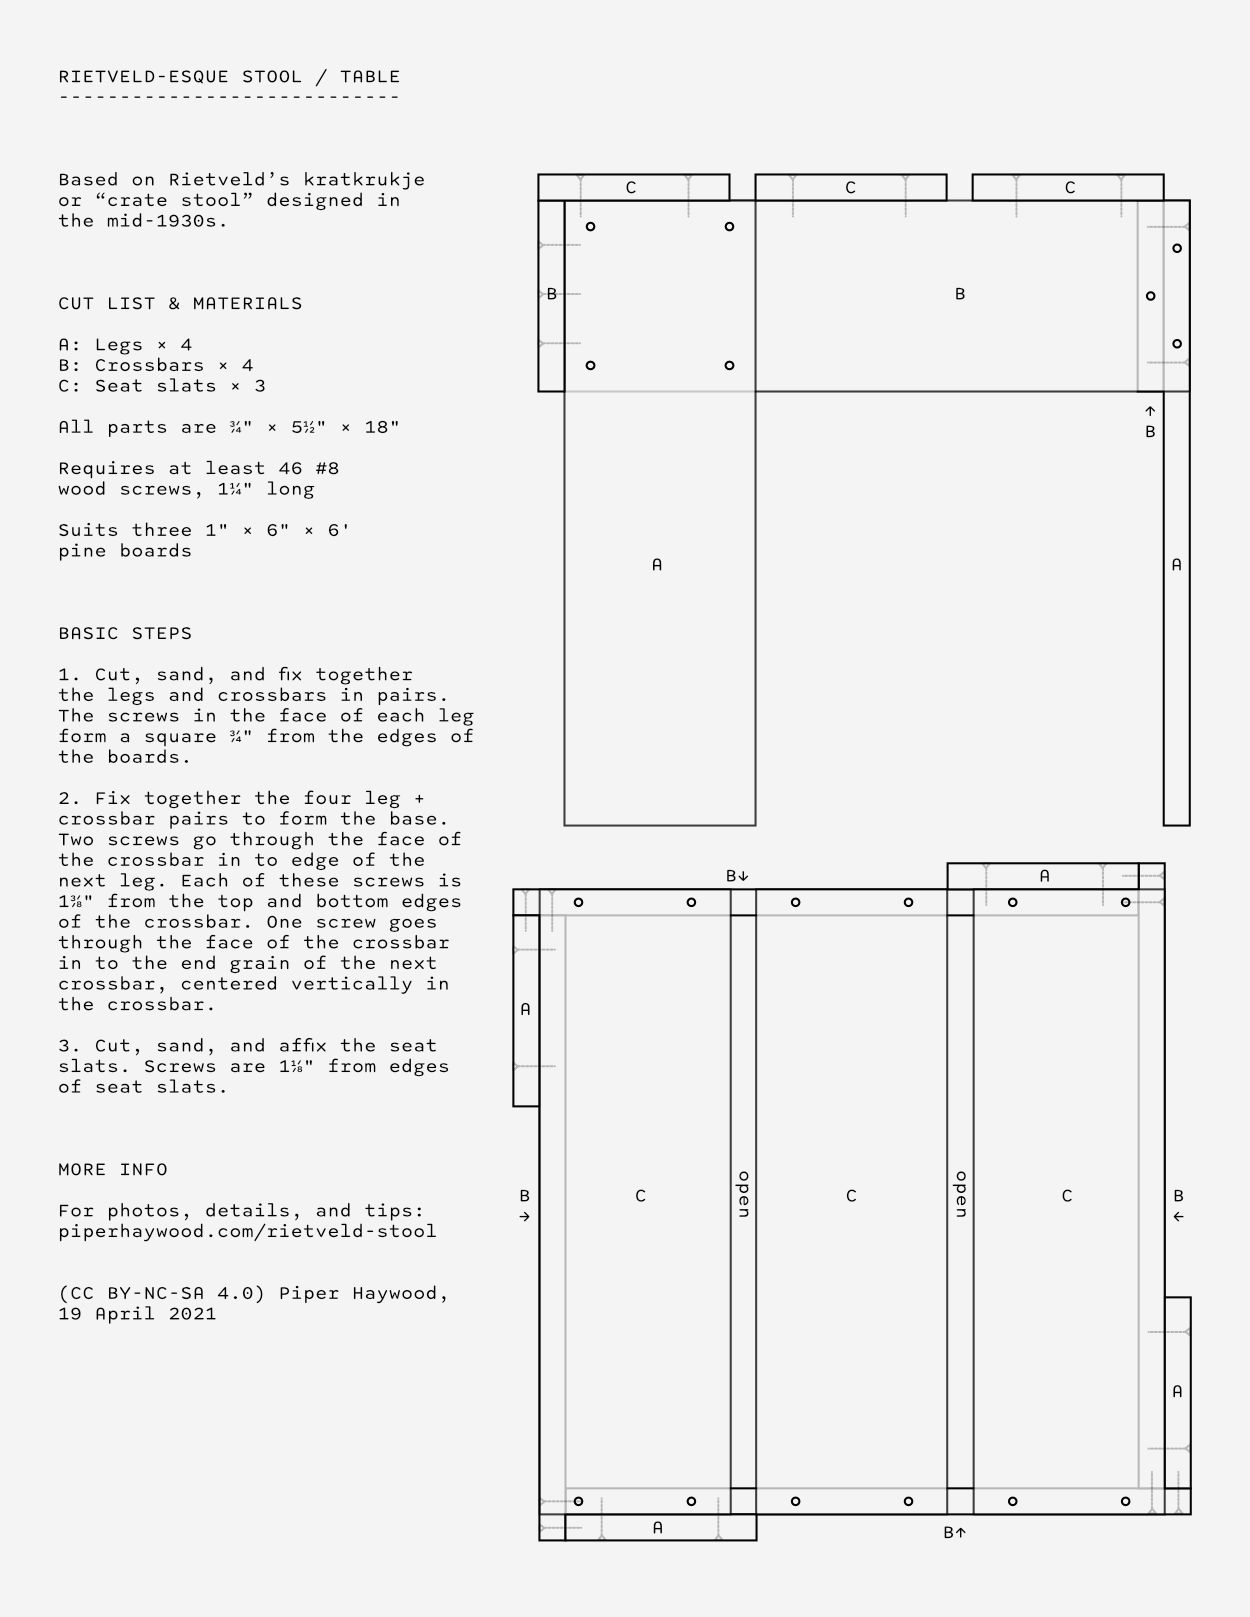
Cut list and plans
This cut list notes actual, not nominal, measurements.
| Label | Part | Quantity | Thickness | Width | Length |
|---|---|---|---|---|---|
| A | Legs | 4 | ¾″ | 5½″ | 18″ |
| B | Crossbars | 4 | ¾″ | 5½″ | 18″ |
| C | Seat slats | 3 | ¾″ | 5½″ | 18″ |
Instructions
These instructions are pretty verbose since they aim to be beginner-friendly. If you’re more experienced, you can probably just assemble your tools and materials and go to town with the cut list above.
I recommend at least skimming the instructions though since there are a few gotchas that we learned from along the way. The biggest one being: always use a countersink bit before you use your drill bit. Almost all advice online says to do it the other way round, but that just results in a messy, jagged hole. No one wants that.
To be clear, I wouldn’t say this is a perfect Rietveld crate stool because this wasn’t done to any original plans of his. And even if we did follow plans, his would probably be in metric. That said, it’s pretty close to his work. If you’re somewhere that sells timber in metric (I envy you…), see the notes on metric measurements down below.
Collect your tools
At minimum, you’ll need:
- Sharp handsaw, preferably something meant for precision like a pull saw
- Electric drill (charge your battery!)
- 7/64″ bit to drill pilot holes appropriate for #8 gauge screws
- Countersink bit
- Coarse and fine sandpaper
- Pencil
- Ruler, ideally longer than 18″
- Screwdriver bit for your electric drill that matches whatever screws you’re planning to use
- At least two clamps, but ideally loads; you may be able to get away without clamps if you have someone else to help
Things that are nice to have:
- Gloves. Construction lumber like pine and other whitewood can give you some nasty splinters (ask me how I know).
- T-square. You can use some other square thing in a pinch (a piece of paper, a book, etc.) if you’re checking the squareness of your wood, but a t-square makes it a lot quicker.
- A scrap, squared-off block of wood. This is useful as a prop when you’re clamping the leg + crossbar pairs to one another.
- Hard flooring that you can sweep up, or a big drop cloth. This isn’t crazy messy, but sanding does kick up a bit of dust.
- 7/64″ countersink combination bit. This is a bit that combines both a normal taper point drill bit and a countersink part, the countersink section has a hole running through it to seat a 7/64″ taper point drill bit which you tighten with a little Allen key. They often come in packs corresponding to the most common screw sizes. It saves a ton of time!
- Electric saw like a circular saw, miter saw, or table saw. You can absolutely do the whole thing with a handsaw (we did), but the speed of an electric saw would be pretty convenient. If you’re going to use an electric saw, make sure you have safety goggles.
- Pair of sawhorses. You can easily get away with using two chairs and/or a table instead.
Collect your materials
- Scrap cardboard to make pilot hole templates
- At least 46 #8 wood screws with flat / countersunk heads; 16 must be 1¼″ long, the rest could be longer
- Three 1″ × 6″ × 6′ boards
A note on the screws: The reason you need 16 that are 1¼″ long is so that you can attach the legs to the crossbars. Any shorter and they won’t hold well, any longer and they’ll likely pierce the back of the crossbar which is undesirable. The rest could be longer than 1¼″ since they’ll go in to end grain or board edges. If you’re going to go longer elsewhere, just make sure your drill bit is long enough to create an appropriate pilot hole.
We got our wood and screws from the big orange DIY store you find throughout the US. We wanted to go with brass screws but unfortunately they didn’t sell them in the length we needed, so if you want something other than zinc plating, I recommend ordering online.
I wouldn’t recommend ordering lumber online unless you’ve got a merchant you really trust or are willing to accept whatever arrives. By buying lumber in person, you can take care choosing your boards.
Choosing construction lumber for furniture can be kind of tricky. A lot of the boards you’ll find at big DIY stores will have defects that might make them poorly suited to even rough-and-ready furniture like this. You might have to look through a lot of lumber, but it’s worth choosing the straightest, most defect-free boards you can.
When you go to pick your lumber, take a ruler or tape measure. Some of the boards might be a bit off in terms of width, depth, or length. In my experience, the width is off more often than the depth. You’re looking for 1″ × 6″ × 6′ (nominal measurements) boards with an actual height and thickness that is as close to ¾″ × 5½″ as possible. Boards a little longer than 6′ are fine, avoid shorter since then you might not have enough wood to work with.
To check for defects, place one end of the board on the floor and the other end at eye level. You’ll be creating a right-angled triangle, with the board as the hypotenuse so that you can look down the length. Check for cupping, bowing, and twisting, then flip the board and do it again. This should reveal most issues. It should also reveal if the grain is running parallel to the length of the board, as it should. If it doesn’t, this means that the board is less structurally sound.
You should also check for structural issues such as splits along the grain—particularly at the ends since this means that you’ll lose a bit of length on your board—and spalting. Spalting can be kind of pretty, but the discoloration is caused by fungi and can undermine the structural integrity of the wood. It’s also worth considering knots and knot placement. If you’d be bothered by a knot falling out, press each one make sure they’re sound. And be aware that knots are much harder than the surrounding wood. This may make sawing or drilling tough! I’ve sheared off the head of a screw trying to screw in to a knot, even with a pilot hole.
And finally, check for conversion defects. Conversion defects are issues that can be introduced when the raw wood is milled in to boards. The things I’ve usually seen are torn grain or machine burn. Torn grain looks sort of like pockmarks in the face of a board.
Alternatively you could get hardwood boards for this, and you’ll probably avoid many of the defects listed above. That will be a lot more expensive, and it sort of feels out of keeping with the ethos of Rietveld’s design, but it’s up to you! You can buy a fancy Rietveld crate chair made from beech for €975, so who am I to judge?
If you’re buying construction-grade lumber as we did, keep in mind that you will rarely be able to find a board that is 100% free of imperfections. Avoid anything that truly compromises the structural integrity of what you’re trying to make, but otherwise go with the flow, embrace or work with other imperfections where you can. Conversion defects can often be hidden, spalted boards could be used on a less load-bearing part of your piece, a lightly bowed board might be imperceptible when cut in to smaller lengths, etc.
If you have to store the wood before you use it, store it flat on the floor as opposed to standing up against a wall to avoid introducing additional warping. Even when construction lumber is marked as kiln dried, you should still treat it as “green”.
Cut and sand your legs and cross pieces
To make the legs and cross pieces, you need to cut two of the 6′ boards in to four 18″ lengths each. Bear in mind that 6′ = 72″, so you should have 4″ of extra wood when cutting them up.
That’s a reasonable amount of leeway, but it may not be enough if you aren’t precise with your cutting or your saw teeth are rather thick. In this event that you’re using a thick-ish saw (around ¼″ thick) or are worried about precision, perhaps aim for a shorter length, something like 17¾″. Do not go shorter than 17″, if you do then you’ll have to reconsider the plans since your stool won’t be wide enough for the seat slats.
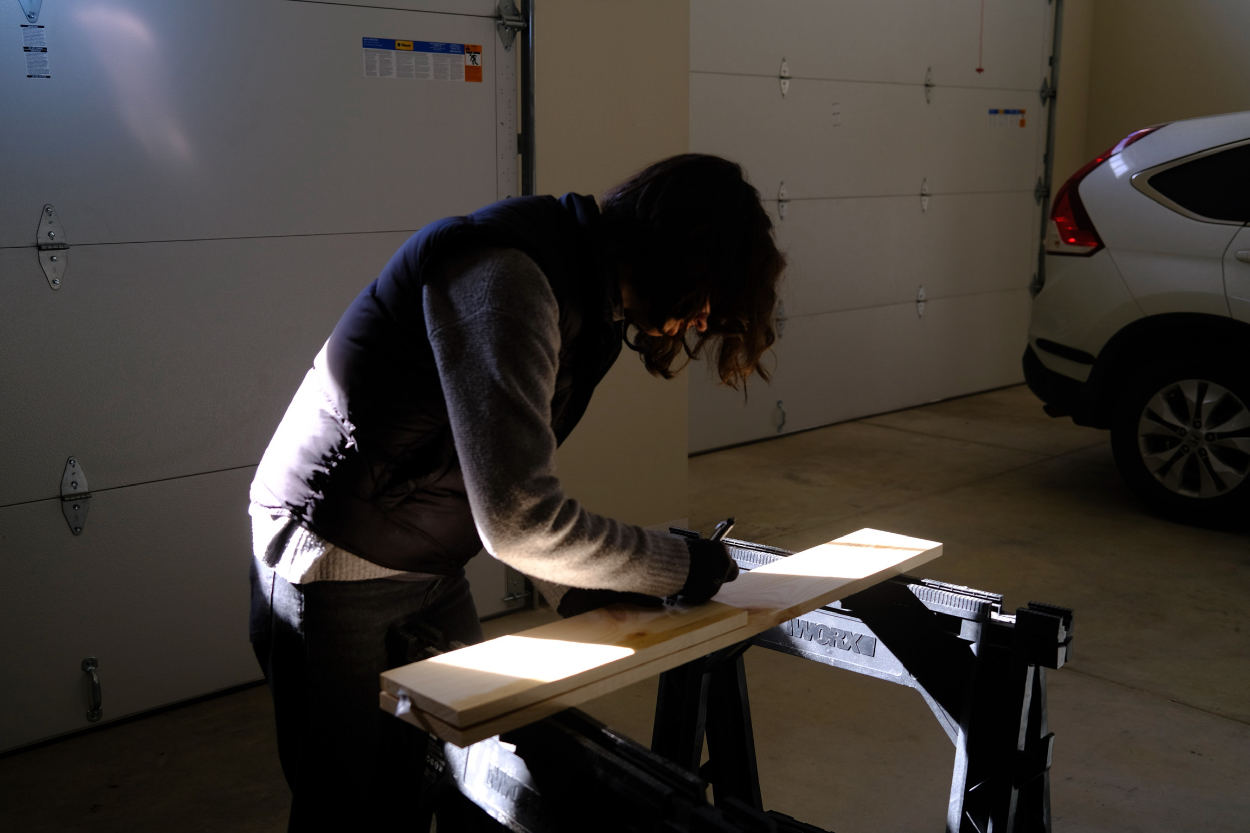
Once you’re sure of your lengths, place your board on your sawhorses/chairs/table with the end you intend to cut extending in to the air. If you’re right handed, the excess board length should be to your left on top of the sawhorse, vice versa if you’re left handed. The “good” side of the board, the side you want to face the world, should be facing up.
Check if the end is square. If not, go ahead and mark a square line and make a thin cut to square it off.
Next, measure your 18″ (or less, depending on guidance above) length on the board and use a pencil to draw a line that is square to your board.
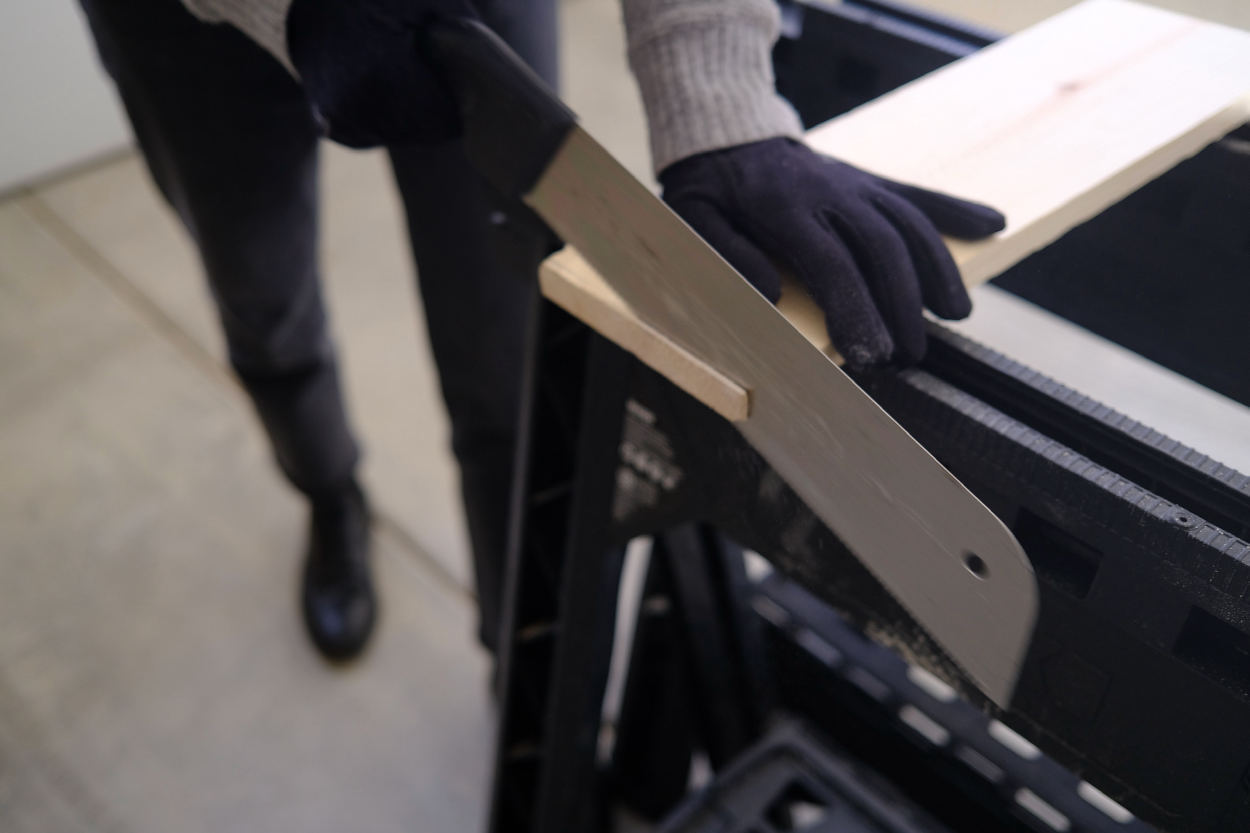
Once you’ve marked your cut, you can start sawing. Using a handsaw can be a little tricky if you’re not familiar with it.
The first thing to remember when sawing is to account for the kerf. The kerf is the thickness of the cut that your blade makes. The thicker the teeth, the wider the kerf. To ensure you get the full length you’ve measured, place the blade to the outside of the line you’ve marked.
Next, create a small guiding notch. You’ll want to push the blade if you’re using a pull saw, or pull the blade if you’re using a push hand saw. This is a bit gentler than the other way round, which helps avoid having your blade wander out of place.
Once you have your notch, use long strokes to continue with your cut. Do not put pressure on the saw, let the blade to do the work. Keep an eye on the saw to ensure it remains vertical and square to the board. If the blade seizes up, gently work it out and start again at the top of your cut. Seizing might mean that you went off-square at some point, and gently re-sawing through your existing cut will remove the tiny bit of excess of wood that is causing things to stick.
When you get towards the end of your cut, be wary of tearout. Either flip the board to cut through the other side or have someone stabilize the end so that it doesn’t fall off too early, ripping a chunk out of your board.
Once you’ve cut your first length, continue marking and cutting the rest of your board in to the appropriate lengths as described above until you have your eight pieces.
When they’re cut and ready to go, sand your legs and cross pieces along the grain to get rid of the most egregious rough areas. You can do some sanding later on when the stool is assembled, but it’s a lot easier to get the bulk done now. Wear gloves if you have them.
Make your pilot hole templates
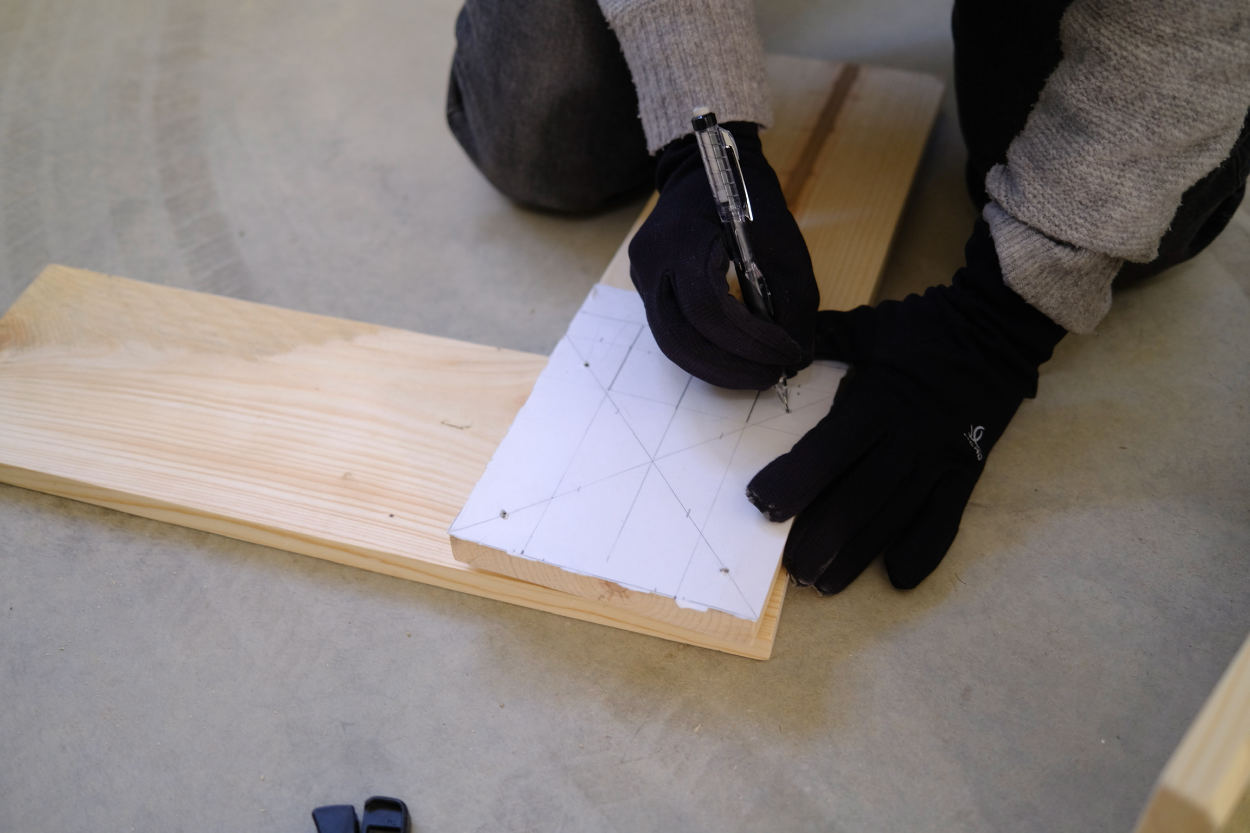
Note: You don’t *have* to make templates, but we found that it makes the rest of the process quite a bit quicker.
Get a piece of scrap cardboard, then draw a 5½″ square, a 1½″ × 5½″ rectangle, and a ¾″ × 5½″ rectangle. Cut these shapes out with scissors or a utility knife.
The square template will be used to mark the pilot holes that will attach the legs to their matching crossbars. On the square, mark four holes that are ¾″ from each side.
The 1½″ × 5½″ rectangular template will be used to mark the pilot holes that will attach the crossbars to the end grain of the next crossbar and the vertical edge of the next leg. On the rectangle, mark two holes that are 1⅜″ from the shorter edges and ⅜″ from the right longer edge. Mark another single hole that is ⅜″ from the left longer edge and is 2¾″ from the shorter edges (should be centered along the long edge). The three hole marks should make an isosceles triangle all together.
The ¾″ × 5½″ rectangular template will be used to mark the pilot holes that will attach the seat pieces to the edges of the crossbars on the stool base. On the rectangle, mark two holes that are 1⅛″ from the shorter edges and ⅜″ from the longer edges (should be centered along the short edges).
Punch tidy holes in the appropriate places on your templates with your drill or some other tool.
Drill pilot holes in your legs and crossbars, then screw them together
First, roughly lay out each “face” of your stool base on the floor, pairing up a leg and a crossbar for each face. The leg and crossbar should lie perpendicular to one another to create a right angle with the boards aligned on the left and top edges. Try mixing and matching things to get the best results out of any imperfections in your boards, avoiding knots where you know you’ll need to drill.
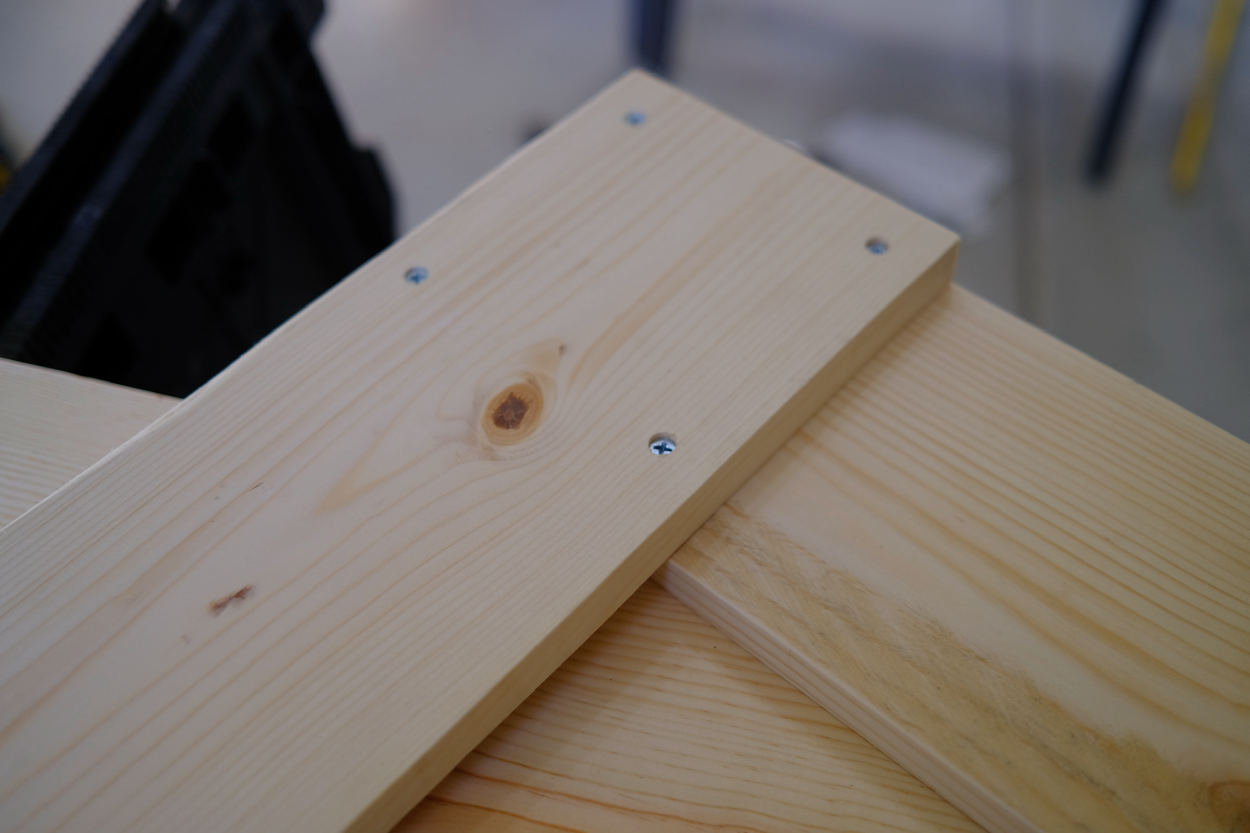
Once you’ve got your configuration laid out, use the square pilot hole template to mark your pilot holes on the top end of each leg which overlaps a crossbar.
Take the first leg + crossbar pair and align everything so that it is square, then clamp them together. Place the pieces on a work surface with the overlapping corner hanging off. Place something beneath the leg if necessary to stabilize the unit so that you can drill straight down instead of at an angle.
Finally, drill your first pilot holes.
If you’re using a separate countersink bit, use the countersink bit first, and then use your drill bit to drill the pilot hole as deep as your screw. If you’re using a combined countersink + drill bit, use an Allen key to set the length of your drill bit equal to the threaded length of your 1¼″ screw.
Once you’ve got all of your pilot holes in this leg + crossbar pair, screw them together using your 1¼″ screws.
Proceed in the same fashion with the remaining three leg + crossbar pairs.
Drill pilot holes in your crossbars and adjacent leg + crossbar pair, then screw them together
Lay out all of your leg + crossbar pairs flat on the floor with the “good” side facing up. Using the 1½″ × 5½″ rectangular pilot hole template, mark out your pilot holes on the right ends of the crossbars which will eventually fasten to the next leg + crossbar pair. The two holes should be to the right and the single hole to the left, as if the triangle formed by these pilot holes is pointing at the leg piece.
Next, you’ll attach one leg + crossbar pair to the next until the whole base is assembled. You’ll be assembling the base upside down, so with the legs up in the air and the “top” of the seat against your work surface. We’re assembling it upside down so that the seat is completely level. It’s a lot easier to fix uneven legs than it is to fix an uneven seat.

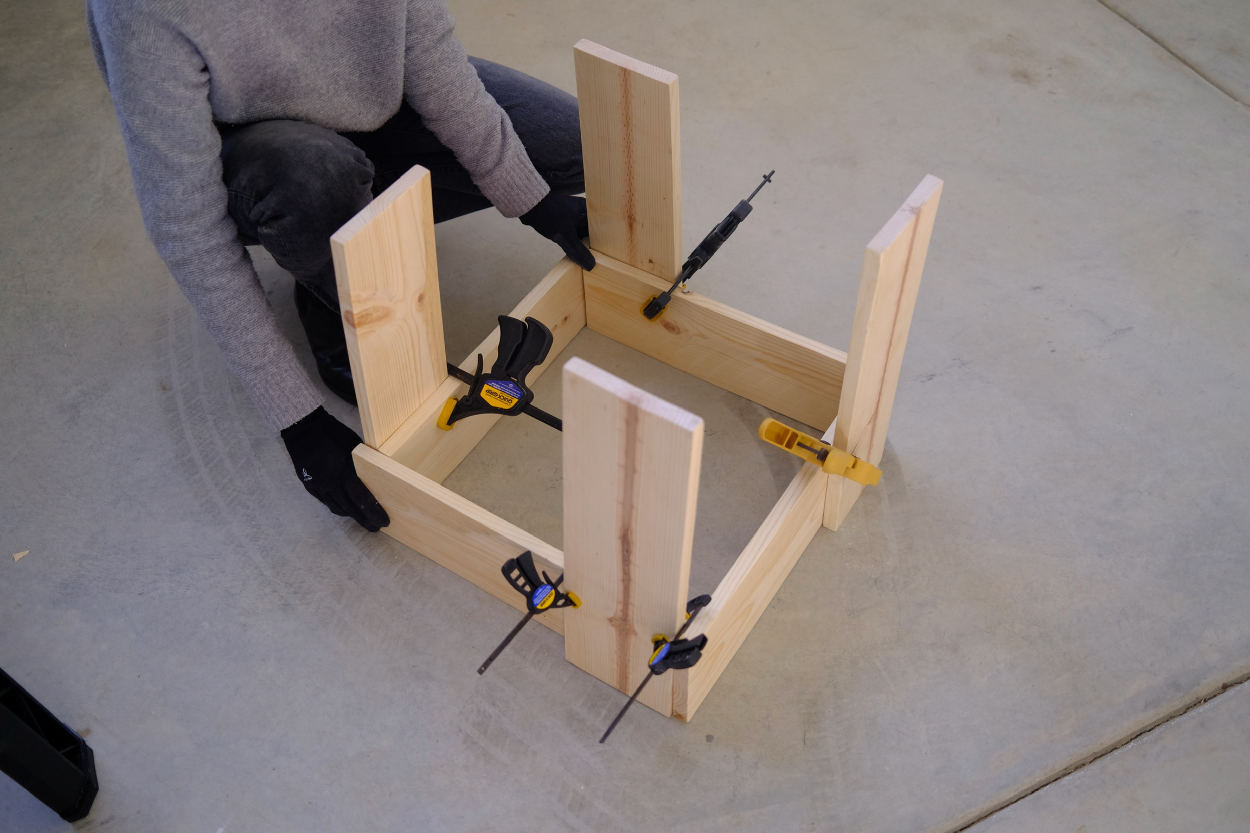
You’ll want to follow the plans at this point because the arrangement can be a little tricky.
Place one of your leg + crossbar pairs (pair #1), with the top edge of the crossbar along a work surface and the leg up in the air. Place another leg + crossbar pair (pair #2) with the same orientation (upside down) but perpendicular to the first leg + crossbar pair. The end grain of the crossbar on pair #2 should be flush with the face of the face of the leg from pair #1. If this is all aligned correctly and you put your pilot holes in the right place, you should see that two pilot holes will shortly be drilled through the face of crossbar #2 in to the edge of leg #1, and one pilot hole will be drilled through the face of crossbar #2 in to the end grain of crossbar #1.
If you have clamps and a scrap square block of wood, place the block of wood in the corner you’ve created and clamp both crossbar #2 and pair #1 to the block so that everything is secure and square. If you don’t have clamps or a scrap block of wood, get a friend to help you stabilize things as best you can.
Drill your pilot holes largely in the same way that you drilled your pilot holes previously (countersink first), then fasten your screws in place.
Continue in the same fashion with the rest of the leg + crossbar pairs.
Check that your legs are even
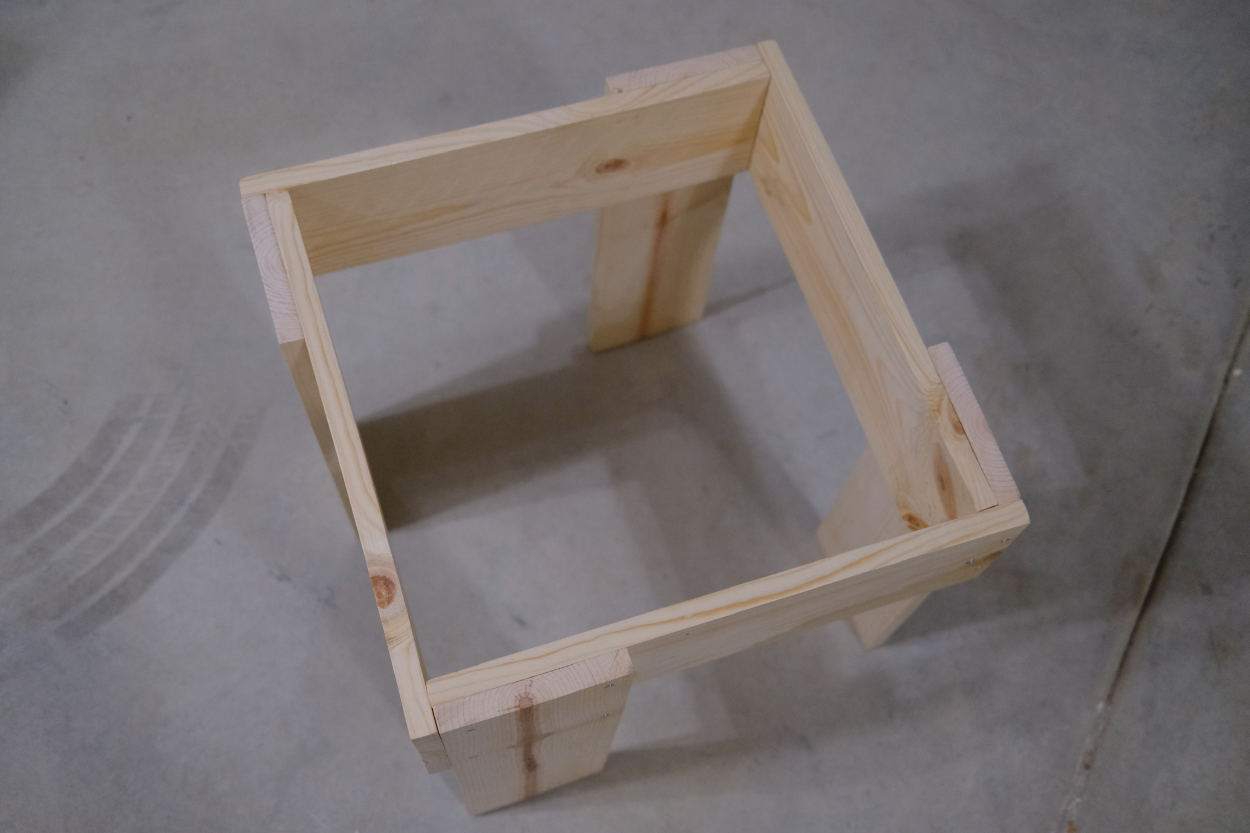
Once the base of the stool is complete, there is a very good chance that not all of your legs will be exactly the same height. If the difference is substantial, then use a ruler or tape measure to measure the length of each leg, making a note of the shortest leg. Mark this shortest length on the inside of each leg, then use your saw or coarse sand paper to get rid of the excess length where necessary.
Cut and sand your seat pieces
At this point, you should have a stable stool base and one remaining 1″ × 6″ × 6′ board which we’ll use to create three seat pieces. You should have about 18″ left over from this board when the stool is complete.
If you used 18″ lengths for your crossbars, then your seat slats should be 18″ as well. Regardless, go ahead and measure your base just to double-check. Place your stool base upright on the floor or a work surface and measure across from the face of one crossbar to the face of the opposite crossbar. Make a note of this measurement since this is the correct length for your seat pieces.
Mark and cut your seat pieces in the same way that you did for your leg and crossbar pieces, then sand them down along the grain. You may want to take extra care sanding these pieces since they’re most likely to catch on clothing.
Drill pilot holes in your seat pieces and base, then screw them to the base
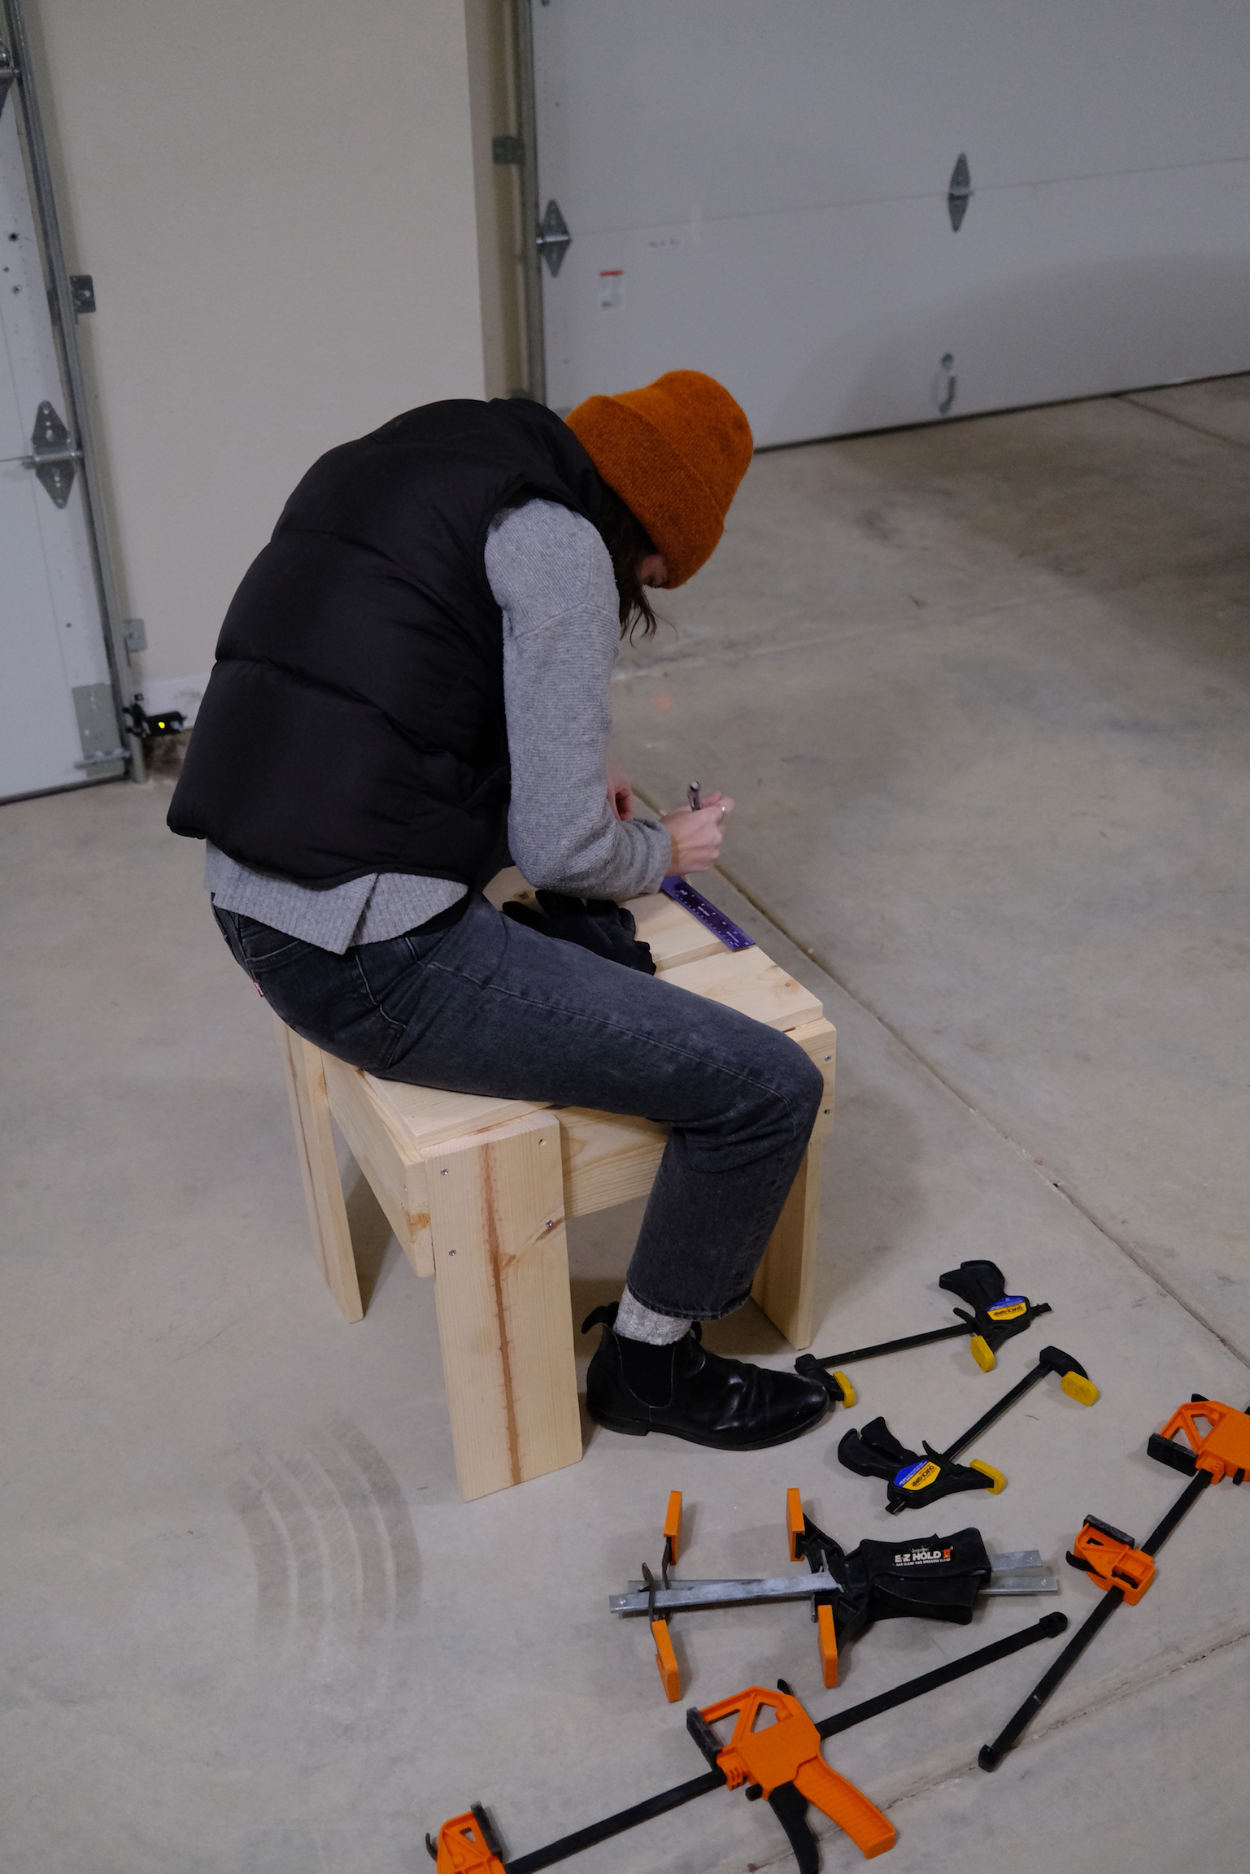
Choose which side of each seat piece you want to face up, then mark pilot holes on each end of your seat pieces using the ¾″ × 5½″ pilot hole template.
Place the stool base on the ground square to your body. Place one of the seat pieces on top of the base and align it so that the end grains of the seat piece are flush with the faces of the crossbars to your left and right, and the edge of the seat piece is flush with the crossbar that is closest to your body.
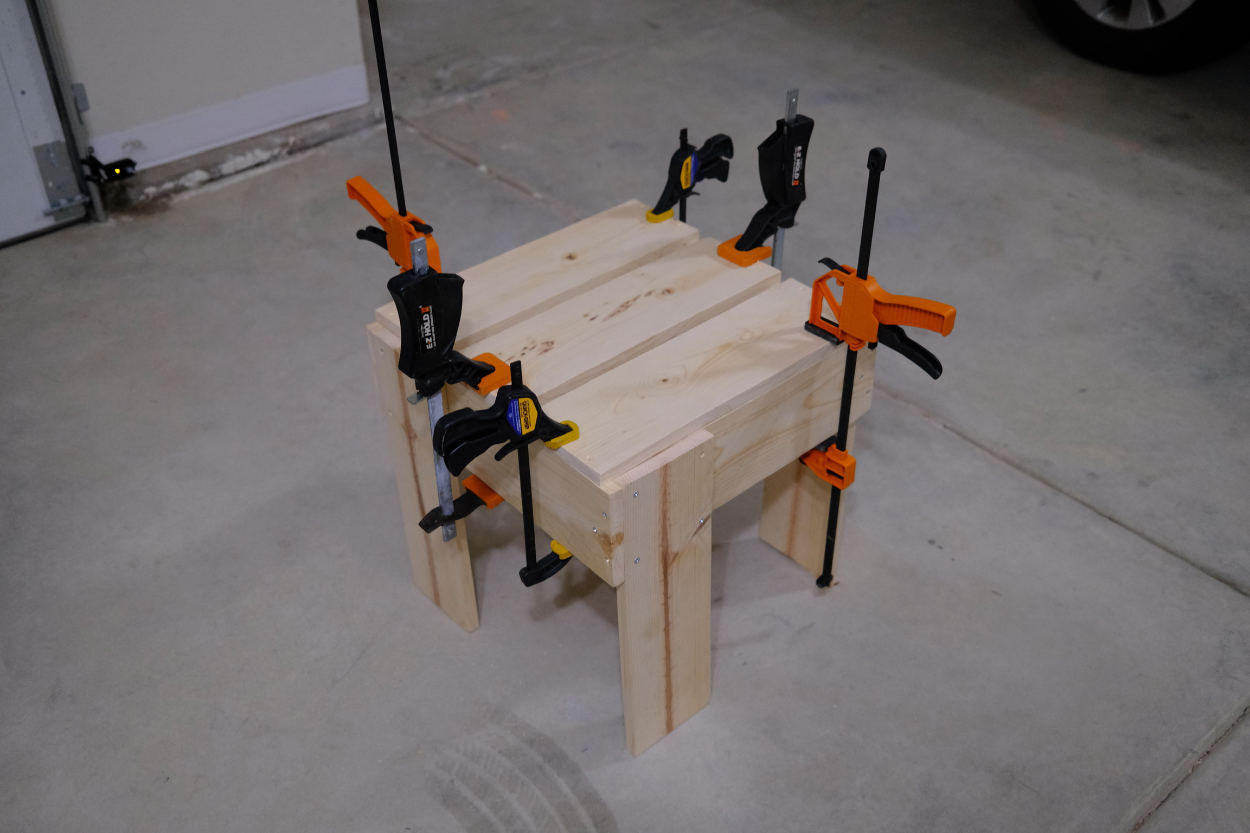
Clamp this seat piece in place or have a friend help you stabilize it, then drill your pilot holes in largely the same fashion as before. Screw this piece in place.
Rotate the seat base 180 degrees and repeat the same steps with another seat piece, leaving yourself with a gap in the middle for the final seat piece. Drill the pilot holes and fasten the screws as before.
Place the final seat piece between the two other seat pieces, splitting the distance. There should be small gaps between each seat slat. Drill the pilot holes and fasten the screws as before.
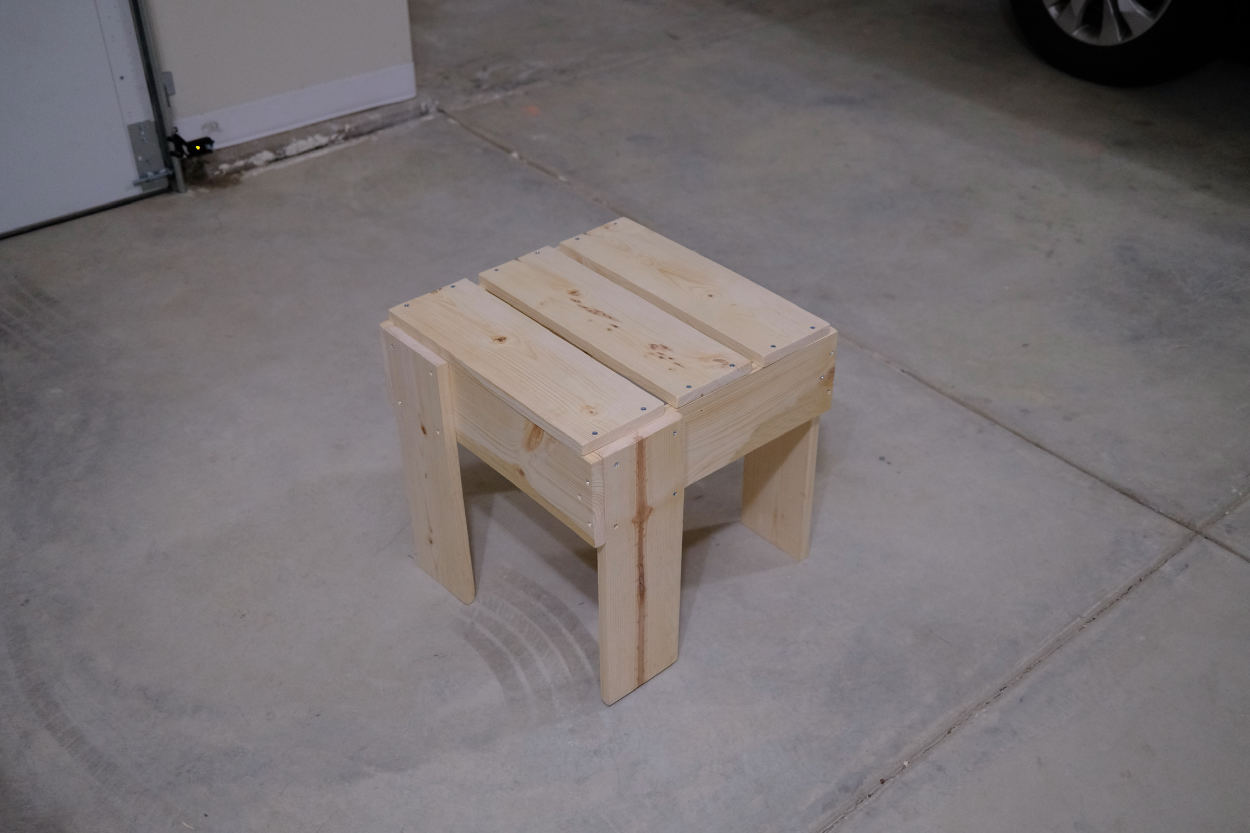
Sand down any final rough patches, then sit on your new stool!
What if you’re using metric measurements?
You’ll have to adjust these plans if you’re working with metric measurements.
The first thing to convert is the wood dimensions, you have to find the closest equivalent according to what’s available in your area. If you were to convert the actual board dimensions used in this project to millimeters, you’d be looking for boards that are 19.05mm × 139.7mm × 1828.8mm boards, but of course you’re unlikely to find boards that are exactly this size.
If I were in the UK, I would probably look for planed all round (PAR) or planed square edge (PSE) 22mm × 150mm timber boards. I think this is close to what Hannah used for the legs, seat, and back of her crate chair. This would probably result in a stool that is more delicate (probably a little more elegant!) than the one we made, but it should be very similar.
Once you know the actual dimensions of your boards, I’d recommend re-drawing the plans in millimeters based on your measurements. You’ll particularly need to adjust the screw placement to account for a different board thickness since you want any pilot holes in end grain or edges to be centered correctly.
You may need to adjust your screws too. A #8 gauge screw in the US is equivalent to 4mm, and it’s probably best to stick with that if possible unless you have good reason. Regarding the length, you want to make sure that your screws are long enough to go through one and a half of your boards when sandwiched together, and ideally not long enough that they’ll pierce the boards.
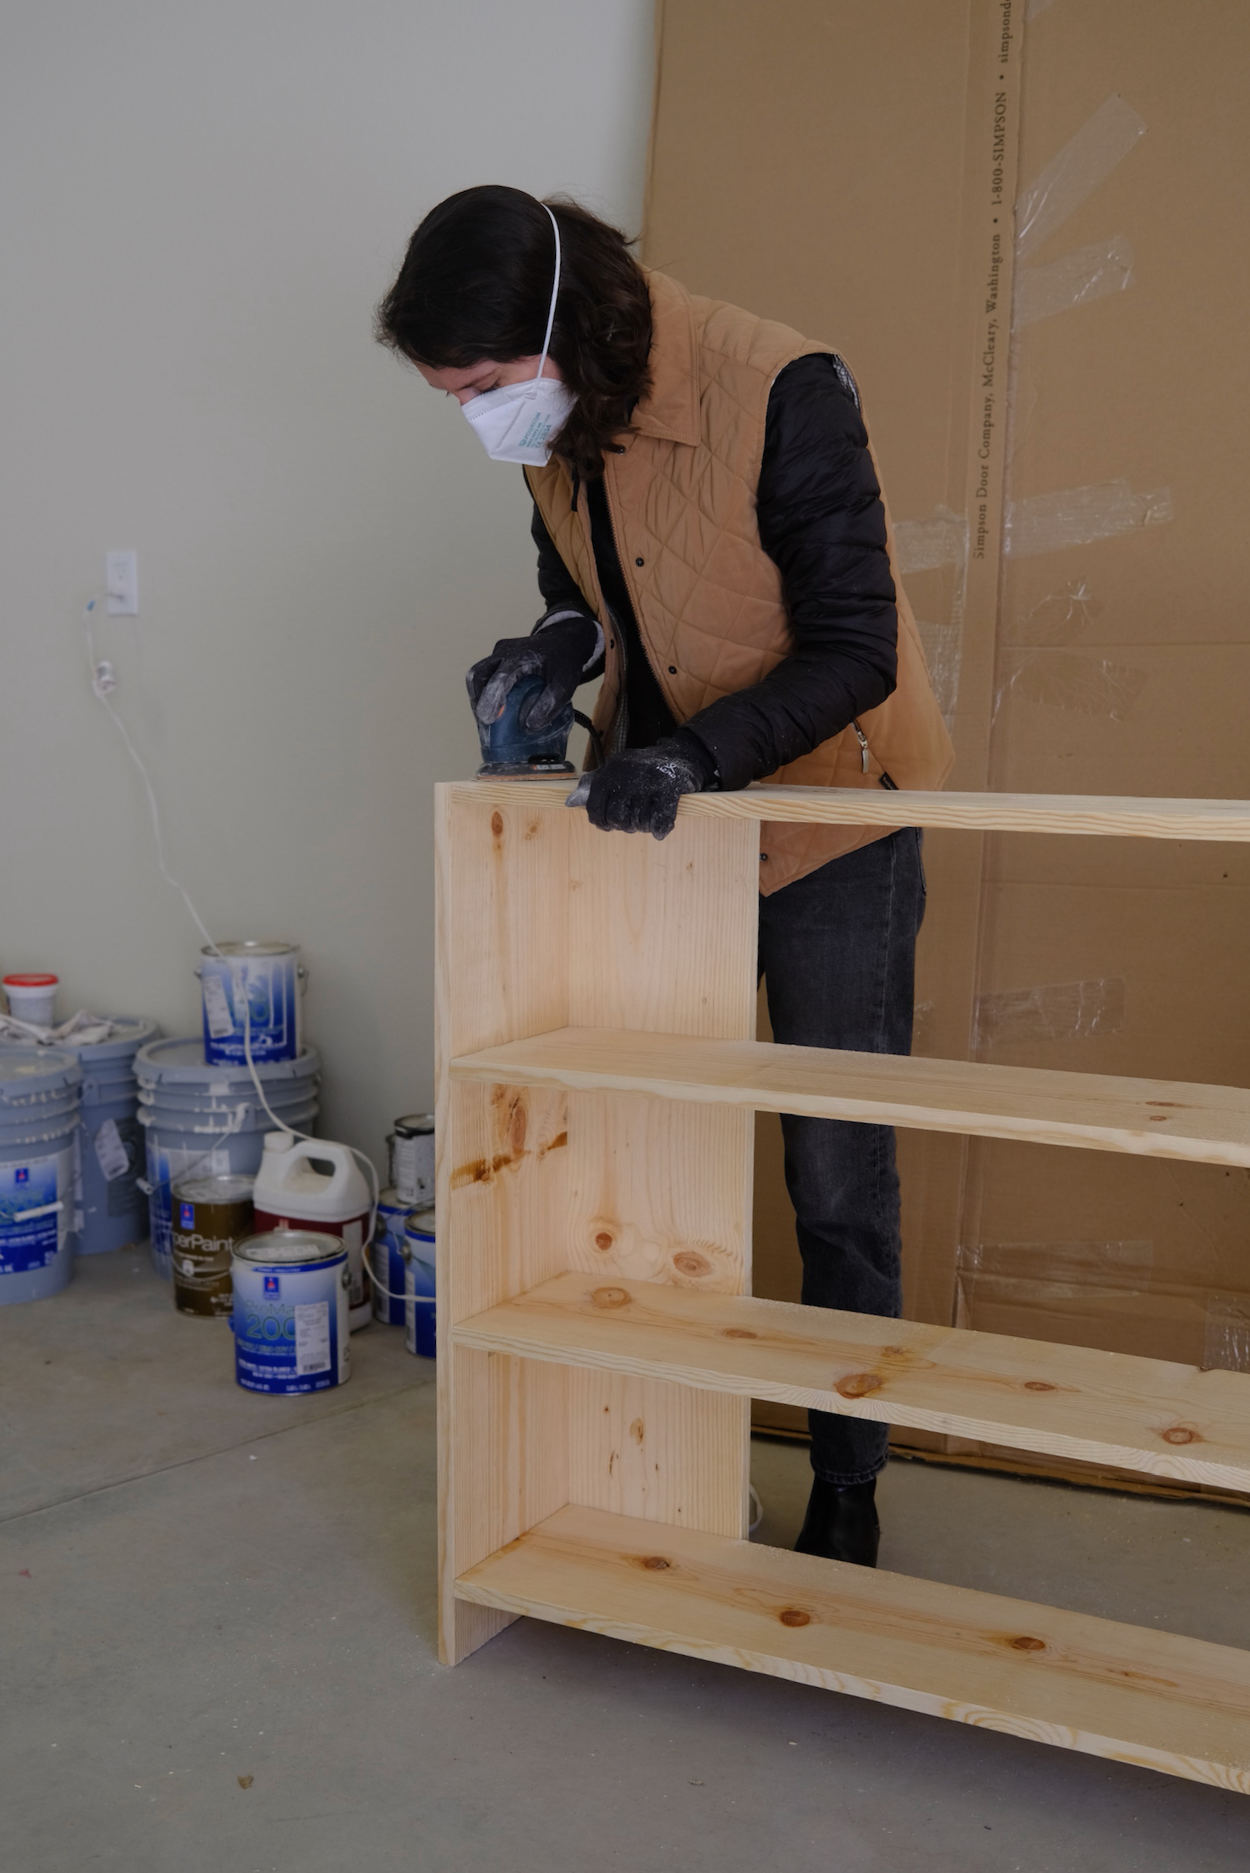
This stool / table has been so useful, really pleased with it. We made some crate shelves as well, but I didn’t keep as good of notes for that unfortunately. There are proper Rietveld shelf plans floating around online though, so have a dig if you’re interested or get in touch with me if you have trouble finding them.
The next thing I’d like to make is a much smaller utility stool. It’s getting hard to bend down to put on socks and that sort of thing, so a little stool I could throw around would be great.
I’d like to make something along the lines of Charlotte Perriand’s pine stool for Les Arcs, but I wouldn’t realistically do the joinery. Don’t have the tools or the time right now. The proportions are right though.
I saw a guy on a smoke break sat on a similar but more ad hoc stool outside a cabinetry place near Pier 80. It looked like it was made out of a single board. Will probably do something that is a cross between Perriand’s and the smoke break stool, out of one 2″ × 10″ × 6′ board. Hopefully when I find the time and am back in my parents’ better-equipped garage.
Thanks to Sam for the photos, always being much more diligent about visually documenting the process, and for the Spot Mono font suggestion on the plans.