Published

First Christmas at home

Dried orange ornaments on a Christmas tree

This is the first Christmas we’ve ever spent at home, not at Sam’s parents’ or mine. Both are just too far away, it wasn’t right to travel and the stress would have been unreal.

Because of that, this is the first time we’ve had a tree. We’ve accumulated ornaments over the years but they’re all packed away, so we decorated with an origami star, popcorn garland, red ribbon, and dried orange slices. Cadbury chocolate ornaments were an added bonus when a box arrived from Sam’s folks. We missed family and friends, NYE could not have been more different from last year, but it was a lovely quiet time.

We did a pretty traditional British Christmas dinner with turkey, gravy, roasted potatoes, glazed carrots, roasted sprouts, bread sauce, Yorkshire pud, and Sam’s mom’s sticky toffee pudding.

Also made a big batch of Cumberland sausage meat for pigs in blankets and then sausage rolls in the new year. We used this recipe for the sausage meat, but just used 20% fat minced pork instead of mincing our own. If I do it again, I’ll just buy dry toasted breadcrumbs instead of making our own. It was crazy simple though since we weren’t planning on stuffing sausage skins or anything. Would definitely make it again, though we’re trying to reduce the amount of meat we’re eating in the new year.


One big Yorkshire pudding

These are guidelines to make one big Yorkshire pudding in a round cake tin. You can use cast iron, or lots of individual tins (could probably use a muffin tin…), but a round cake tin was all I had a the time. For more guidance, I think that this Serious Eats article is pretty strong.

If you can, make your batter the night before and let it rest in the fridge. If you can’t, just make sure you let it rest for at least 30 minutes before you plan to stick it in the oven.

To make the batter, whisk together 2 c (250 g) all purpose flour, 150mL milk*, 4 eggs, and a good pinch of salt in a big bowl. Don’t over-whisk it, you want to treat it like you would a pancake batter.

When you’re ready to bake it, preheat the oven to 4450 / 230C. Pour a good amount of veg oil or goose fat in to a circular cake pan, then heat the pan and fat in the oven until it’s super hot. When everything’s preheated, open the oven door and quickly pour in your batter. It should sizzle and start to puff immediately. Close the door and DO NOT OPEN IT until the Yorkshire pudding is done, around 15–20 minutes.

* You can use milk substitute for this, I use oat milk and it works great. Just don’t use a substitute that is sweetened or flavored.

Published

What it was like being a poll worker

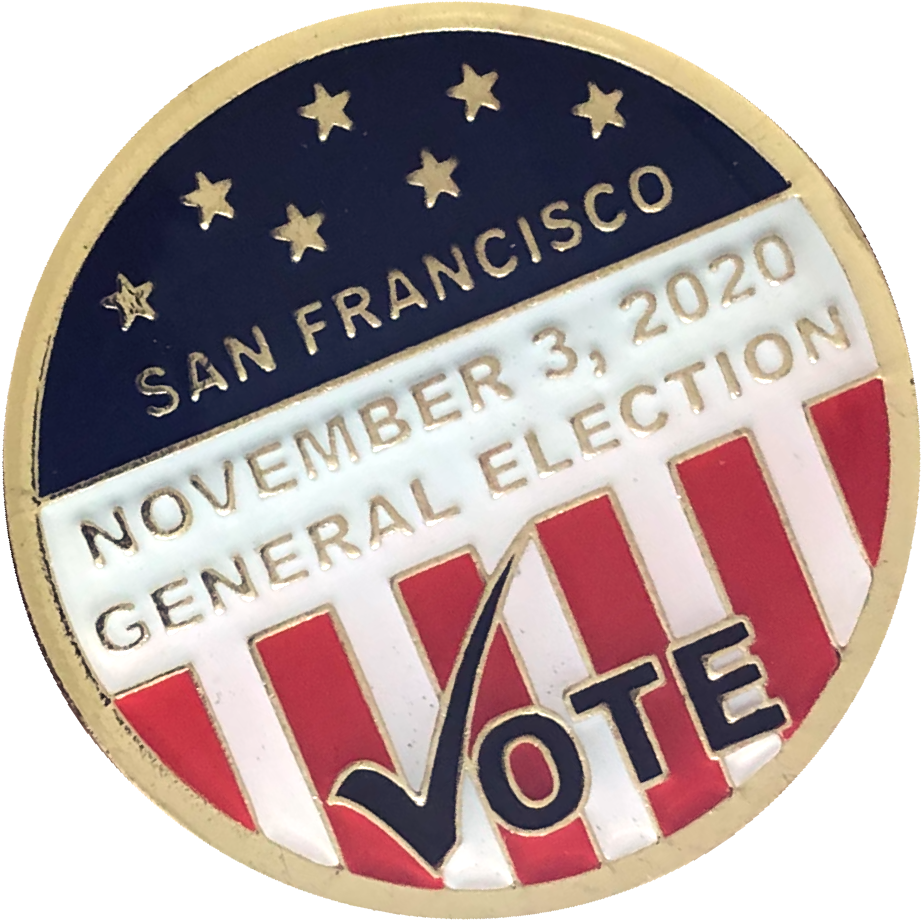
Circular enamel pin for the November 3, 2020 General Election in San Francisco

Being a poll worker was great. I think a lot of that had to do with the people I was working with all day (very nice), the precinct I was in (comfortable), and how busy it was (super quiet). It was a good way to be introduced to it, all in all. And I got a shiny new pin. 🙂

We really didn’t have that many people come in to vote, likely due to the big push for Vote By Mail. The vast majority of people were coming by to drop off their ballot. The longest the line ever got was about 5 people deep in the morning, then by about 11am or so there was almost no line at all. It was pretty chilly, unusually windy out and we had to have the windows and doors open all day for ventilation, but that wasn’t too bad.

There were only two frustrating points.

Read more

Published

Some thoughts after finishing CA poll worker training

Just finished my poll worker training for the November 3 election. I’ve been impressed with how SF has rolled their remote training out. The one disappointment was that I couldn’t pause it and then resume it another day. I had assumed I could (shouldn’t have assumed!) and ended up having to redo an hour of it.

We’re to arrive at 5:45am on election day and will likely be there until 9:30pm or later. Polls open at 7am sharp and stay open until 8pm, with anyone in line at 8pm being permitted to vote. The whole process is a bit more complex than I anticipated, but I guess it makes sense given the scale of the operation.

Most of it is about common sense, common courtesy, and following instructions, but some points surprised me a bit. When someone comes in to the polling place to vote, we’re to offer them PPE and share the health and safety protocols they need to follow, perfectly sensible. But if they refuse to wear a mask or stand six feet from other people, we’re not allowed to turn them away. The right to vote supersedes health and safety guidelines. Ultimately this makes sense, it is the way it has to be. I cannot imagine the chaos that would ensue if an anti-masker were turned away at the polls… But it felt counter-intuitive at first, and it makes me hope that elderly folks that might normally volunteer are reconsidering for this particular election.

Electioneering is another interesting topic. It was only mentioned once in the introduction when talking about protecting voters’ rights, but it’s likely to be a problem in this election I think. In the San Francisco-based training that I did, electioneering was described as visible or audible advocacy for anything on the ballot, gathering signatures for a political petition, displaying campaign literature, and wearing campaign buttons or t-shirts within a 100 foot radius of the voting place. Electioneering rules on election day are different in each state, but most are somewhat similar to this. I think a lot of people might not realize it’s not ok to wear their Biden/Harris or Trump/Pence t-shirt to go vote!

The point that probably surprised me the most relates to poll watchers. The legalities vary a lot state-to-state but in California, there aren’t any statues about it to my knowledge. The training stated that in California, poll watchers must be welcomed so long as they’re not intimidating voters, don’t interfere with or slow down the voting process, don’t interfere with voters’ rights, and aren’t compromising the safety of the voters or workers (as in, they’re not causing the polling place to exceed pandemic-related capacity restrictions).

The qualifications in other states can be very particular. You can see a decent rundown on this ncsl.org page but check with your local election official to be sure. Based on what I’ve read, the most common qualifications and requirements often include restrictions on the number of watchers allowed per polling place, being a registered voter in the precinct, wearing an identifying badge, being officially appointed by your party (with sometimes byzantine sub-requirements), and being registered in advance as a watcher with your county. The most restrictive states are probably Minnesota (watchers not allowed, only challengers, and they can only be appointed after gathering 25 signatures regarding a specific issue) and West Virginia (doesn’t permit them at all). Ohio was the only state I found that doesn’t allow poll watchers to carry firearms or deadly weapons.

The problem is that these restrictions will likely be overlooked by much of the “army” (our president’s militant wording, not mine) being urged to “watch very carefully” by President Trump during the first debate and on Twitter throughout this election cycle.

People are fearful that they can’t trust anything they read in the mainstream media, and the flames of those fears are being fanned by deliberate acts of disinformation by the Trump/Pence campaign such as spending thousands on Facebook ads promoting unfounded rumors about Biden. Based on that fear, it’s understandable that they would want to witness the veracity of an election for themselves, particularly since one of the only leaders they trust is urging them to do so.

So we have a situation where likely tens of thousands of people are ready and willing to be poll watchers. All well and good I guess, as long as they all stick to the rules. The Trump/Pence campaign is making some small effort to keep their official poll watchers on the right side of the law using training videos.

But what about the unofficial poll watchers? The people that don’t know better and take it upon themselves to make sure everything is going according to Trump’s plan? They put themselves at risk of heavy fines and even jailtime, let alone putting others at risk and debasing our electoral process depending upon their actions and intentions. Considering the aggressive vigilantism we’re currently seeing among the far right — the Michigan governor kidnapping plot and the FBI’s recently published Homeland Threat Assessment are cases in point — I would be sad but absolutely not surprised to see some explosive behavior among unofficial poll watchers in Florida, Pennsylvania, Arizona, and elsewhere.

I think it’s unlikely that I’ll see many problems at my precinct in San Francisco. And even if something arises, the SF poll worker training made it clear that it’s not our responsibility to de-escalate, that we’re to call the Election Center who will provide guidance and get the right people involved if necessary. I’m more worried about the swing states. You’d hope that cooler heads would prevail, but there hasn’t been a whole lot of that these past four years.

Published

Applied to be poll worker

Just applied to be a poll worker in the upcoming US election. It involves setting up your assigned polling place, opening for voters by 7am on voting day, checking in voters using precinct rosters and issuing ballots, closing the polls, and transferring custody of voting materials. The day usually lasts from 6am to 10pm and involves training in advance.

I figured they may have fewer poll workers than normal with the pandemic. My schedule is plenty flexible and I’m not considered at high risk for COVID, so I ought to help out. If you’re interested in assisting in your city, search “become a poll worker in <your city>” online to find the relevant information.


Update 19 August 2020: It took took a bit longer than I’d expected for me to be contacted after submitting my application. I received a followup email today, a little over two weeks after submission. Just mentioning here in case anyone has done the same and is a little confused about when they’re supposed to hear back.

Published

“I propose to take our countrymen’s claims of American exceptionalism seriously”

America believes itself exceptional, the greatest and noblest nation ever to exist, a lone champion standing between the white city of democracy and the terrorists, despots, barbarians, and other enemies of civilization. One cannot, at once, claim to be superhuman and then plead mortal error. I propose to take our countrymen’s claims of American exceptionalism seriously, which is to say I propose subjecting our country to an exceptional moral standard.

Ta-Nehisi Coates, Between the World and Me

Many passages in Between the World and Me are worth quoting, but this one really hit home. Coates also brands this “patriotism à la carte” in his Atlantic article “The Case for Reparations” (see below).

This blind national pride has been particularly painful to many people recently with the wildly inadequate pandemic response, the killing of George Floyd, unmarked federal officers’ violence in Portland, and so many more recent events.

I’d forgotten about how very pervasive it is until I got back to the US in early June. It’s insidious, sad and borderline delusional. And it’s not just a right / conservative thing.

It’s all well and good to be proud of your accomplishments, but if you can’t identify and work to rectify your failings then what the hell is the point?


I’ve been speaking with some friends about this book, they mentioned a few resources I’d like to follow up on.

And I’m still working through my previous list.


I just finished “The Case for Reparations” and learned so much.

Coates weaves together individual and collective experiences, history, and data to connect the dots between the Jim Crow South, the Great Migration, redlining by the Federal Housing Association following the New Deal, the efforts of the Contract Buyers League, Belinda Royall’s early and successful petition for reparations in 1783, John Conyers’s HR 40 bill, the early history of slavery in the US, the failure of Reconstruction, the levelling of Tulsa’s “Black Wall Street” and its subsequent suppression in law and the media, the myth of fatherhood as the antidote to Black poverty, the fuzziness of affirmative action, the “gulag of the Mississippi” Parchman Farm, the impact of Germany’s post-WWII reparations on Israel and the evolution of contemporary Germany, the prevalence of subprime lenders preying on Black home buyers in the run up to the 2008 crisis, and so much more.

He argues for the cooperation of every aspect of society in a real discussion and debate about reparations to “reject the intoxication of hubris” and bring about “a revolution of the American consciousness, a reconciling of our self-image as the great democratizer with the facts of our history”.

HR 40, the Commission to Study and Develop Reparation Proposals for African-Americans “to examine slavery and discrimination in the colonies and the United States from 1619 to the present and recommend appropriate remedies”, has progressed since Coates wrote “The Case for Reparations” in 2014. Texas Representative Sheila Jackson Lee is now first sponsor of HR 40 having taken over from John Conyers in 2018. There has been some progress with the bill, but a vote has not been set.

Published

Finding the rhythm

I’ve finally fallen in to a decent daily rhythm, it’s taken a while post-move.

My ideal routine seems to involve being at my desk around 8:30am, then calls and correspondence with UK+EU clients and collaborators until 10 or 11.30am (depends on the day). A bit of toast or something, then try to get my head down on a particular dev task for 1–2 hrs before lunch. Not a lot of time to finish any one thing, but can usually at least progress with something. This is a good window for writing, actually! After lunch, a bit more correspondence with folks in North America and then try to get my head down again until the end of the day. That’s usually when I get the most tricky stuff done.

Of course not every day looks like that, but I think that’s what I need to aim for. When it’s thrown off, particularly when I have to interrupt the head-down time for some reason, I tend to feel like I haven’t accomplished anything in the day. Which is garbage, b/c of course I have got some stuff done. Still, it’s not a nice feeling.

Also I was doing so well with exercise before we moved, now have fallen of the horse. Need to work that back in somewhere.

I also need to be careful about not working too long of hours… It seems easy to slip in to overworking during lockdown since there’s SO LITTLE TO DO. But inevitably I start to feel burnt out after a few days of carelessness, even if the overworking is on projects I’m super thrilled about. Just need to keep tabs on it.

Published

You are your environment

SF has felt like a tech monoculture for the past 10 years. It’s one of the big reasons we were originally planning to be in / around NYC instead.

I’m sure there’s more to it, but it’s kinda hard to find in the current situation, especially in our neighborhood. The worst thing is the possibility of slipping in to it personally, becoming one-dimensional.

Been on my mind since a lot of the indoor things I usually love doing (reading and cooking are two of the biggies) aren’t ticking the boxes at the moment. It might not be the city, it’s probably more related to the move or the pandemic. Maybe I need to check out Oakland? I guess time will tell, I’ll try harder in the meantime. You are your environment.

Published

Landed in SF

The sun setting over San Francisco in June

So.

After a lot of planning and quite a few delays, we’re now in the US. We’d considered NYC for a long while for a whole host of reasons, but we ended up in SF. Our first week has been overwhelmingly sunny so I’m thankful for that. It’s nice to be “home”, but it will be a while before it feels like it.

It was a weird journey. Very overwhelming, but in a way that makes your mind go blank and surrender rather than spin out. The trip itself was eerie, so empty. Wearing a mask for 32 hours wasn’t as uncomfortable as I thought it would be. Silver lining: a face mask makes the air on a plane feel much less dry.

I might go in to it a bit more at some point, but that’s enough for now. Slowly adjusting to feeling like an immigrant in my home state after 10 years in the UK.

Published

Added layers to my hair

I’ve been growing my hair out for a little while. I loved having it short, but the £££ required to keep it up is not something I’m willing to commit to just yet. I’d like to give long hair a try but get put off when it gets around shoulder length. Not keen on feeling it around my neck and I hate finding long hairs on my sweater, pillow, etc.

It’s at the I-can’t-stand-it point now, looking pretty Basset Hound-y, so time to cut it.

I followed this YouTube tutorial with a few modifications to account for my wavy hair and lack of any straightening options. I skipped the trimming steps since I’m ok with the length right now, it just needs a better shape so that it’s less heavy at the bottom.

These are the basic steps to add layers.

  1. Gather your tools. Make sure you have enough clips + hair ties and a pair of actual hair scissors. I think ours are this pair from Sanguine, about £14.
  2. Assess how much you’re going to take off. Stand in front of the mirror and assess how long you want the shortest layer to be. Do not pull your hair straight to do this. If you have hair that is anything but stick-straight, you need to make sure you account for the loss of length when it is dry. Once you’ve decided, take a small section of hair from the very top of your head in line with your ear, hold it at the length you’d like, and then measure how much you’re planning to take off. Make a mental note or something to remind yourself of how much you’re planning to take off so that you can refer to it when you start cutting.
  3. Assess the angle you’ll use. In one hand, continue to hold the small section of hair that you grabbed in the previous step at the length that you want your shortest layer to be. In the other hand, grab another small section of hair from the same side of your head just behind your ear. The two sections should be directly on top of each other, neither of them should be further towards the back or the front of the head. Pull each section directly away from your head and towards each other. You want to bring the very end of the bottom section up to meet the point at which you’re planning to cut the uppermost layer. On my hair this was a roughly 45 degree angle. If / when my hair gets longer, I might be pulling it more directly upwards like the stylist does in the video. Remember the angle you establish since you’ll use that in a moment.
  4. Section your hair. Separate your hair in to sections by making a centre part from your forehead back to the nape of your neck and then additional top-to-bottom parts on either side of your head. Make sure each of the sections is tightly secured. I separated it in to four parts as he recommends in the tutorial, next time I’ll do six though since it would suit my hair thickness a little better.
  5. Trim the first section. Let down one of the front sections, and then brush it up and out in the angle you established previously. Holding it up at that angle, slide your finger or a comb through from front to back just around the height of your ear, and then let the lower piece down. This is forming a decent base so that you retain the length. If you don’t do this, you might end up getting some shorter layers falling out when you try to put your hair up! Run your brush through again at the required angle to get it smooth, and then put in a hair tie. Slide the hair tie down the hair keeping it at the required angle until it is a few centimetres above the length you’re planning to cut. Bring this loose ponytail slightly forward so that it is easier to see without pulling any of the hairs in the hair tie. Use your fingers in your non-dominant hand to splay the ends out a bit, and then point-cut in to the ends until you have taken off roughly the amount of length you planned to take off. Remember, you can always take off more later. Err on the side of caution.
  6. Trim the remaining sections in the same way you trimmed the first section.

I’m pretty happy with the results. This technique will do for now, but I’ll absolutely head back to a stylist once all of this is over with and we’re settled somewhere. Will miss Dean. 🙁

Related: See this video for what seems to be a decent scissor-over-comb men’s haircut tutorial…