Published

Use Portfolio Starter to create a personal site with projects, pages, and posts

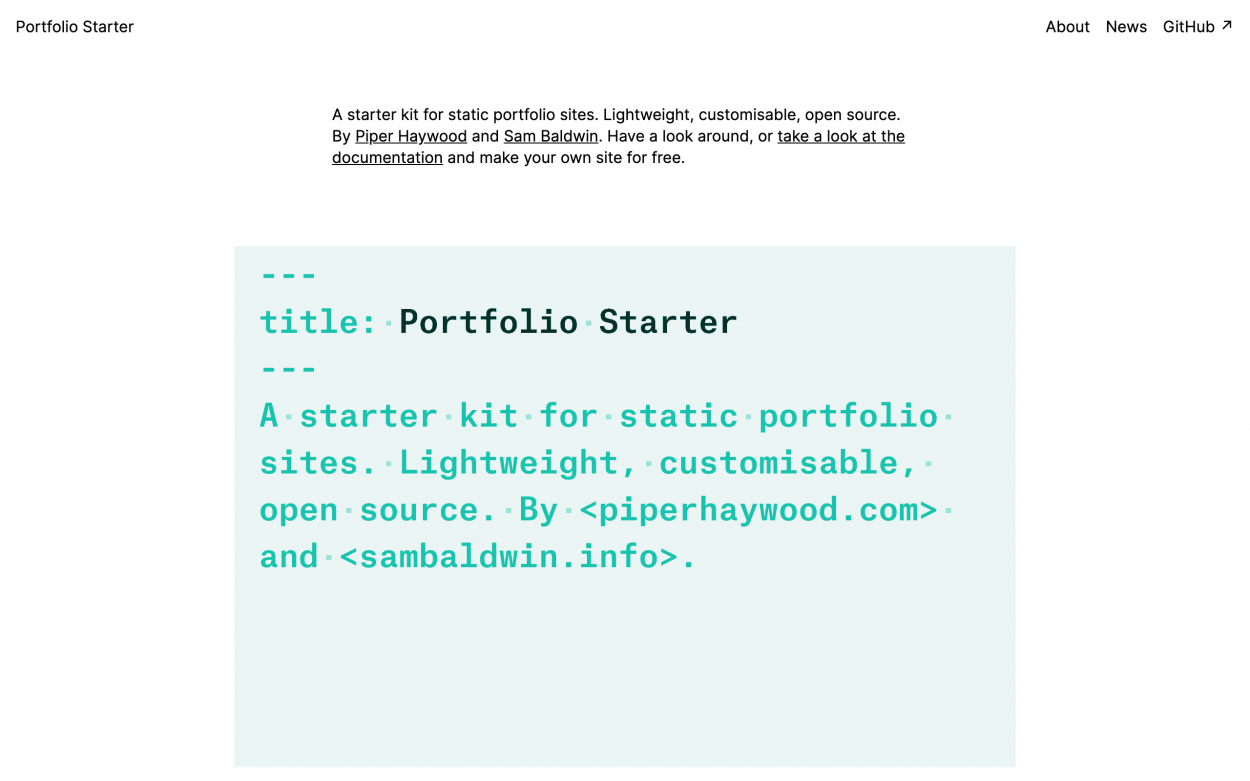
Screenshot of Portfolio Starter

This tutorial will teach you how to set up a personal website using Portfolio Starter, a starter kit for portfolio-driven websites made by Sam Baldwin and me. Check out the demo site to get a feel for how it looks, and visit the GitHub repo for more on how it works.

The tutorial is geared towards people that have little-to-no coding experience and are unfamiliar with things like GitHub, Eleventy, and Netlify. By the end of the tutorial you should understand terms like “repository” and “static site”; you’ll be able to edit your projects, pages, and posts; and your website will be hosted for free. Though basic experience with code such as HTML or CSS may be useful, it isn’t necessary for this tutorial since we’ll be using the hosting user interfaces to set this all up.

Let’s get started

Published

Mix-and-match grain salad

I’ve been making a mix-and-match grain salad a ton recently. It’s great for using up leftovers, and it keeps really well in the fridge as long as the greens you use are substantial enough.

All you do is combine a cooked grain of some sort, greens, at least one soft-ish vegetable, at least one crunchier vegetable, and dressing. Things that I’ve found work in most versions of this salad include kale, green onions, grated carrot, thinly sliced onion, small tomatoes, olives, capers, and cucumber. I find that bagged, chopped-up kale keeps for a super long time in the fridge both before it is prepared and after it goes in to the salad.

Bonus additions include toasted seeds or nuts, feta or grilled halloumi, chickpeas or puy lentils, hardboiled eggs, croutons fried up from the leftover heel of a loaf of bread, bacon bits, leftover roast chicken, that sort of thing. It’s best if you leave the cooked grain overnight in the fridge so that it can dry out a little bit, and when you use it in the salad it’s worth breaking up any clumps with your hands first.

These are some decent combos and their dressing counterparts. I’m counting cous cous as a grain since it functions a similar way!

  1. Components — Wild rice + shredded red cabbage + thinly sliced green onions + grated carrot + roasted peanuts
    Dressing — Rice wine vinegar + soy sauce + sesame oil + minced garlic + sugar + ground ginger
  2. Components — Bulgar wheat + massaged kale (stalks removed) + thinly sliced red or white onion massaged with sumac + diced cucumber + fresh mint / dill / parsley / thyme if you have it
    Dressing — Olive oil + honey + lemon juice + a tiny bit of tahini + minced garlic + salt + pepper
  3. Components — Cous cous + massaged kale (stalks removed) + roasted red peppers (jarred is fine) + toasted pine nuts or cashews + fresh oregano / basil / parsley if you have it
    Dressing — Olive oil + balsamic vinegar + salt + pepper
  4. Components — Quinoa + arugula + diced tomatoes (or whole small tomatoes) + thinly sliced onion + chopped olives and / or capers + canned tuna, drained
    Dressing — Olive oil + red wine vinegar + Dijon mustard + salt + pepper

This is the recipe I contributed as part of a recent recipe chain mail. I normally really dislike chain mails but am always happy to participate in a food-based one!
Published

Added layers to my hair

I’ve been growing my hair out for a little while. I loved having it short, but the £££ required to keep it up is not something I’m willing to commit to just yet. I’d like to give long hair a try but get put off when it gets around shoulder length. Not keen on feeling it around my neck and I hate finding long hairs on my sweater, pillow, etc.

It’s at the I-can’t-stand-it point now, looking pretty Basset Hound-y, so time to cut it.

I followed this YouTube tutorial with a few modifications to account for my wavy hair and lack of any straightening options. I skipped the trimming steps since I’m ok with the length right now, it just needs a better shape so that it’s less heavy at the bottom.

These are the basic steps to add layers.

  1. Gather your tools. Make sure you have enough clips + hair ties and a pair of actual hair scissors. I think ours are this pair from Sanguine, about £14.
  2. Assess how much you’re going to take off. Stand in front of the mirror and assess how long you want the shortest layer to be. Do not pull your hair straight to do this. If you have hair that is anything but stick-straight, you need to make sure you account for the loss of length when it is dry. Once you’ve decided, take a small section of hair from the very top of your head in line with your ear, hold it at the length you’d like, and then measure how much you’re planning to take off. Make a mental note or something to remind yourself of how much you’re planning to take off so that you can refer to it when you start cutting.
  3. Assess the angle you’ll use. In one hand, continue to hold the small section of hair that you grabbed in the previous step at the length that you want your shortest layer to be. In the other hand, grab another small section of hair from the same side of your head just behind your ear. The two sections should be directly on top of each other, neither of them should be further towards the back or the front of the head. Pull each section directly away from your head and towards each other. You want to bring the very end of the bottom section up to meet the point at which you’re planning to cut the uppermost layer. On my hair this was a roughly 45 degree angle. If / when my hair gets longer, I might be pulling it more directly upwards like the stylist does in the video. Remember the angle you establish since you’ll use that in a moment.
  4. Section your hair. Separate your hair in to sections by making a centre part from your forehead back to the nape of your neck and then additional top-to-bottom parts on either side of your head. Make sure each of the sections is tightly secured. I separated it in to four parts as he recommends in the tutorial, next time I’ll do six though since it would suit my hair thickness a little better.
  5. Trim the first section. Let down one of the front sections, and then brush it up and out in the angle you established previously. Holding it up at that angle, slide your finger or a comb through from front to back just around the height of your ear, and then let the lower piece down. This is forming a decent base so that you retain the length. If you don’t do this, you might end up getting some shorter layers falling out when you try to put your hair up! Run your brush through again at the required angle to get it smooth, and then put in a hair tie. Slide the hair tie down the hair keeping it at the required angle until it is a few centimetres above the length you’re planning to cut. Bring this loose ponytail slightly forward so that it is easier to see without pulling any of the hairs in the hair tie. Use your fingers in your non-dominant hand to splay the ends out a bit, and then point-cut in to the ends until you have taken off roughly the amount of length you planned to take off. Remember, you can always take off more later. Err on the side of caution.
  6. Trim the remaining sections in the same way you trimmed the first section.

I’m pretty happy with the results. This technique will do for now, but I’ll absolutely head back to a stylist once all of this is over with and we’re settled somewhere. Will miss Dean. 🙁

Related: See this video for what seems to be a decent scissor-over-comb men’s haircut tutorial…

Published

A damn fine margarita

John makes the best margaritas, finally texted him for the ratios. Needs must!

Most recipes online seem to call for about 2 oz tequila + 1 oz triple sec + 1 oz lime juice (2:1:1). This is way too intense IMO, almost feels more like a martini or something (that’s not the right analogy, but you get what I mean). The extra sweetness from additional triple sec balances things out. I’m calling for Cointreau below because that’s John’s recommendation.

Combine 2 parts tequila + 2 parts Cointreau + 1 part fresh lime juice (2:2:1). If you’re making two, 3 oz tequila + 3 oz Cointreau + 1½ oz fresh lime juice works super well (I tried this using an egg cup as an ounce measure due to where we’re at, YMMV). Shake thoroughly with ice, then strain into one or more glasses of fresh ice. Or use a single huge cube of ice if you’re at chez Goods. If it’s your preference, rub a wedge of lime around the rim of the glass and dip in to coarse salt before pouring in the drink.

Published

CSS note-to-self: `position:fixed;` is not respected within transformed block elements

Note to self: position:fixed; is not respected if the fixed element is within a transformed element.

See a very old meyerweb.com article on the topic. Apparently this is expected behaviour, not a bug, hence why people are still encountering this funkiness nine years after Eric Meyer’s article. As he suggests, it’s a little counter-intuitive!

In my case, it related to a fixed element within a <div> that was being transitioned from off screen to on the screen. I was able to get around it by reversing the transform so that when the element needed to be fixed, I set the containing element to transform: none;. That wouldn’t work in every case though, so YMMV.

Published

Instagram be GONE

My old Instagram account has been languishing unused for about two years, finally got round to moving the images and videos over here. Now I’ll be keeping all that content on this site in a photolog. If they open up their API a bit someday then I’ll syndicate from here to there, but I’m not holding my breath.

Note to self: use Handbrake to convert .mov videos to .mp4. The standard “Fast 1080p30” preset (see docs) is fine for now.

Published

A web color space that respects *real* lightness

Lea Verou just published a blog post about the LCH color space. This is super exciting, see her post for detail. Specifically, the improvement has to do with the perceptual uniformity and lightness being visually consistent no matter the hue.

The best way to get a feel for this is to experiment with her LCH color picker. Drag the hue value back and forth, and you’ll see that the tonality of the background remains consistent. It doesn’t suddenly feel a lot lighter in yellow than it does in blue. Do the same thing in an HSL color picker and you’ll feel the difference.

This would help a lot with the color on my site. I’ve never been 100% happy with how the color is handled because it is too hard to control the lightness and thus the legibility. See the List page for a clear example of this, posts in June and February are particularly hard to read. LCH would solve this!